The first day of the Quilotoa Loop is a hike from Sigchos to Isinlivi. It’s the shortest of the three days spent hiking on the Quilotoa Loop, but it still comes with a decent amount of elevation gain. Walk through farmlands as you descend into the valley before climbing back up the mountains as you come into the tiny town of Isinlivi.
Here’s what to expect on the hike from Sigchos to Isinlivi.
What is the Quilotoa Loop
The Quilotoa Loop is a series of hiking trails connecting small towns in central Ecuador. It’s a popular trip for hikers visiting the country because it offers phenomenal views and a rewarding multi day trek.
Unlike many treks in South America, the Quilotoa Loop is unguided and you can travel at your own pace. You decide how many days you want to hike and where you would like to stay each night.
Traditionally, most hikers choose three days as they hike from Sigchos to Quilotoa, stopping in Isinlivi and Chugchilan along the way.
Hiking Sigchos to Isinlivi
I spent the night in Sigchos, so I was able to get an early start. Most of the other hikers that I spoke to caught the first bus out of Latacunga (at 8:00 am) and then immediately started hiking (typically around 10:00 am). It’s up to you where exactly you start, but note that the bus may drop you off in the town of Sigchos, but the trail starts one kilometer from the the center of town.
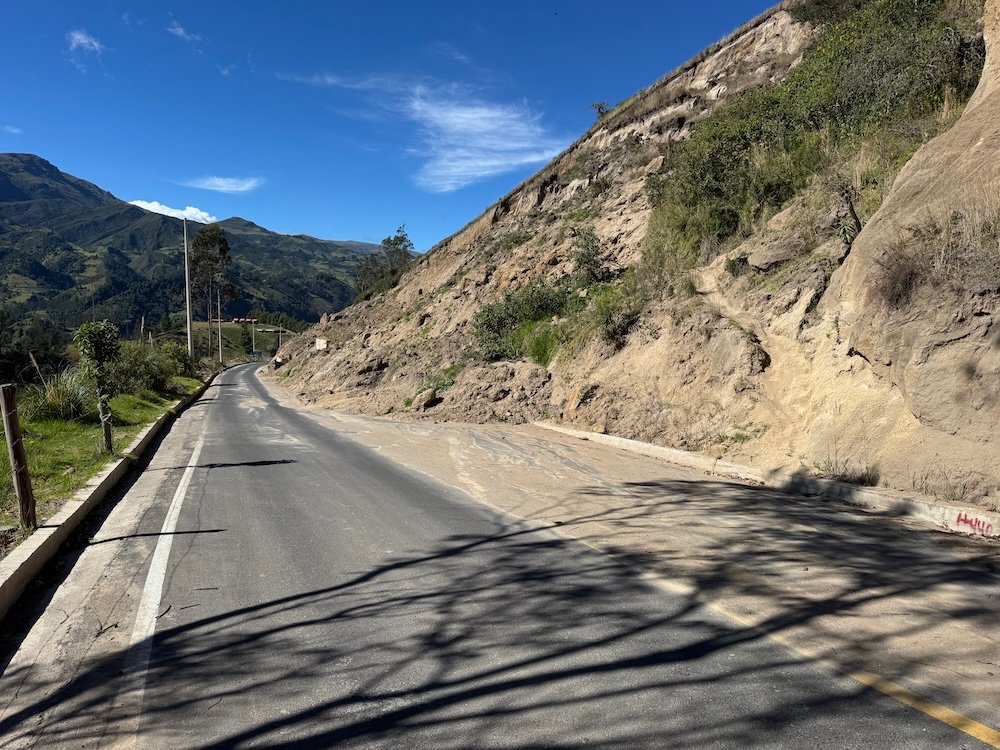
The trail from Sigchos to Isinlivi should follow along a nice cliff and it should be an actual trail. However, I got detoured almost immediately after starting due to a landslide that wiped out not just part of the trail, but impacted the road as well.
Because I had stayed in Sigchos the night before, the woman at my hotel was able to give me advice about how to navigate around it. The hikers that came in straight from Latacunga in the morning were left to figure out how to navigate around it themselves.
So after just a quarter mile on the trail, I followed a small side trail past a house to reach the main highway. The next 1.1 miles (1.8 kilometers) would be following the road which is not what I was hoping. I wanted to hike from Sigchos to Isinlivi, not just walk along the road between the two towns. But as I walked along the road and eventually saw the results of the landslide, I knew that the road was the correct choice.

At about mile 1.4 (kilometer 2.25), I took a trail to the right. I followed this down a few switchbacks before reaching another road. Despite the Quilotoa Loop being a popular hike, you’ll do a decent amount of walking along roads during your trip. I followed the road, descending as I went.
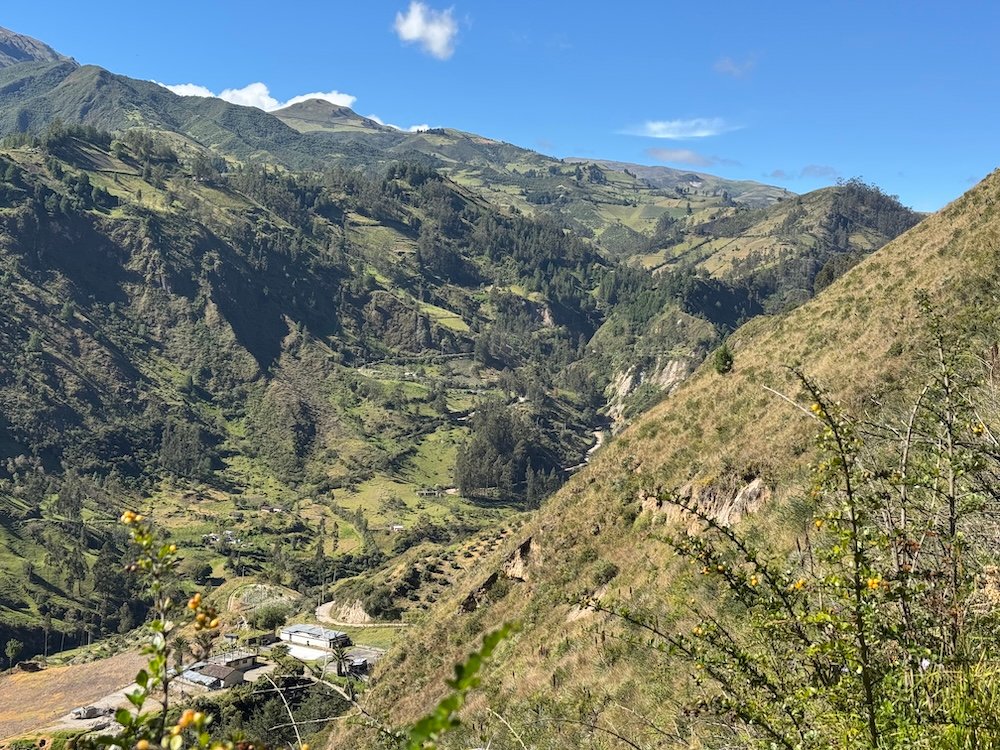
Here’s the thing about hiking the Quilotoa Loop. If you hike from Sigchos to Quilotoa, there’s an overall elevation gain. However, every single day, you’ll descend to the valley before finishing your day with a long climb up. Even if you do the reverse route, you’ll descend first and finish your day with climbing. There’s no way to get the elevation gain out of the way first to make your hike easier.
At mile 2 (kilometer 3.2), the road follows a hairpin turn, but you’ll want to keep walking straight to join a real trail. It’s easy to miss if you’re not paying attention. From here, you’ll hike along some Ecuadorian flat. Like Colombian Flat on the Lost City Trek, Peruvian Flat on the Inca Trail, and Bolivian Flat in the Maragua Crater, it’s not actually flat, so you’ll still have plenty of up and down. It’s just less noticeable than the steep climbs and descents.
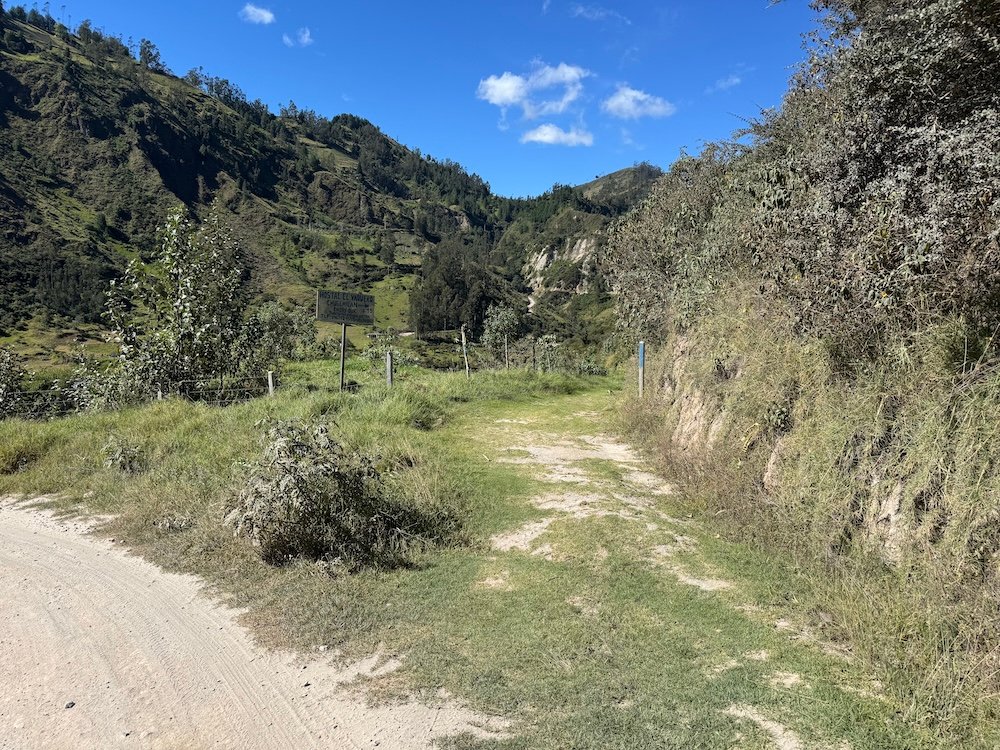
For the next 0.3 miles (0.5 kilometers), I hiked through what felt like a tunnel with overgrown trees and bushes on both sides of me. This made it a bit difficult to see where I was stepping. While I didn’t want to trip, I also didn’t want to step in cow poop, so take care through here.
In addition to the uneven footing, there’s also barbed wire that I had to navigate around. I had seen some information at my hostel in Latacunga that said we should just open gates, pass through, and then close them again if they were in our way. These had nowhere to open, so the only way to continue on was through. I passed three sections of barbed wire. In some I was able to squeeze around and in others I had to go under (typically taking off my backpack to do so). It wasn’t bad, but it was annoying. Thankfully this was the only barbed wire I had to pass through on the three day trek.
I also got lucky. While talking to other hikers, they met some cows during this section. It’s a narrow path already so having to deal with animals and barbed wire did not sound like a fun time.

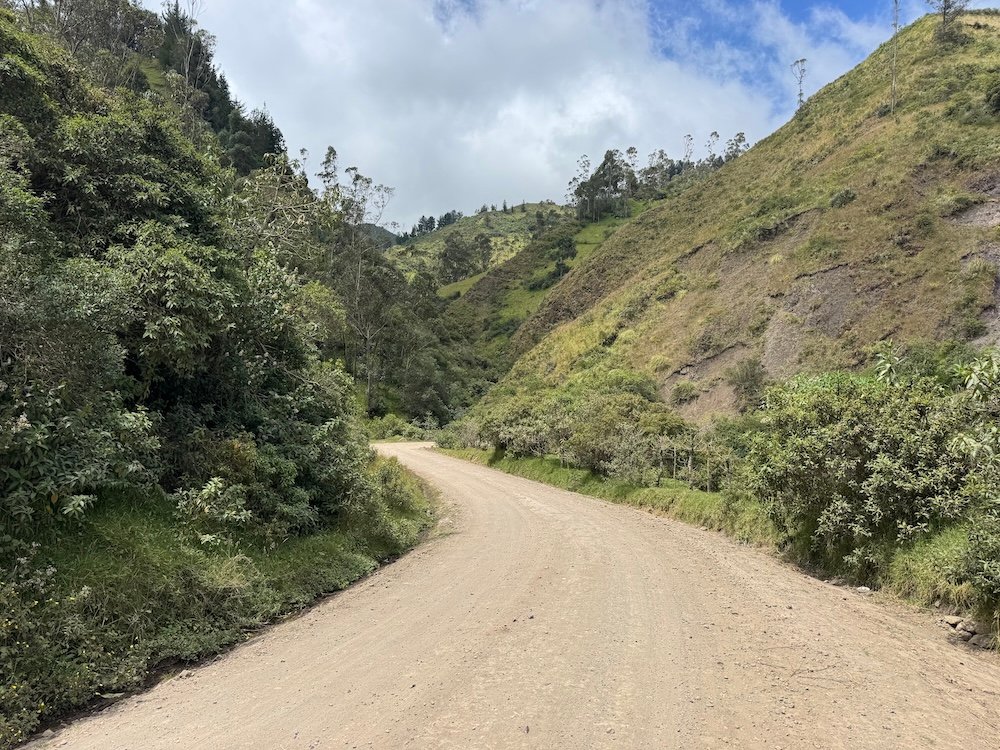
You’ve guessed it. The path joins back up with a road. You’ll follow it for about another 1.25 miles (2 kilometers), but keep an eye on your turn. I missed the turn and had to backtrack. Thankfully I caught it early, but I was still annoyed that I added on nearly a quarter mile to my hiking stats for the day.
By this point, you’re about done with all of the descents and Ecuadorian Flat. It’s time to start climbing, which you’ll be doing for the rest of the trail. Continue following the route, making sure to pay attention and not miss your turn. Around mile 4 (kilometer 6.4), the trail veers left into a field. I missed it and by the time I realized it and hiked back, I added another quarter mile to my hiking stats for the day.
You’ll have just under a mile of climbing through steep switchbacks at this point. This was my least favorite part of the trail. The sun was so warm, it was steep, a cow blocked my path at one point, and I was ready to be done. But I finally made it to the top of the climb. Woohoo!
From here, the last 1.75 miles (2.8 kilometers) were a very, very gradual incline as I worked my way along the road to Isinlivi. According to AllTrails, there is a path that goes through a field that will shave off a tiny bit of distance. I couldn’t find this trail (though I eventually realized I’d have to do a steep descent and ascent if I found it), so I added a little bit of distance and walked along the road all the way into Isinlivi.
Once you arrive, check into your accommodation for the night and take a well deserved break.
Hiking Stats for Sigchos to Isinlivi
Distance: 7 miles (11.2 kilometers) ** it will be slightly less if you make fewer wrong turns than I did
Elevation Gain: 1,752 feet (534 meters)
Elevation Loss: 1,476 feet (450 meters)
Lowest Point: 8,333 feet (2,540 meters)
Highest Point: 9,703 feet (2,957 meters)
Total Time: 3 hours 50 minutes (including a few very short breaks)
Lodging in Isinlivi
Isinlivi is tiny and it’s the smallest town I stopped in while hiking the Quilotoa Loop. There’s two hotels and that’s it. The most popular is Llullu Llama Mountain Lodge and it’s where most hikers will spend the night (although there is another option). This accommodation has both dorm rooms and private rooms, but the highlight is the amenities offered. There’s a spa, sauna, and massage options (all of which cost extra) and the hostel also puts on other activities to see the more of the region.
Plus, the staff is incredibly helpful and is able to provide so much information for those hiking the Quilotoa Loop.
Food in Isinlivi
Your accommodation should include dinner for the night of your stay as well as breakfast the next morning. If not, Llullu Llama Mountain Lodge will be able to help you with some food in their restaurant.
Llullu Llama also has a lunch options available. You can purchase a bagged lunch to take with you on day 2 and if you didn’t have a bagged lunch for the first day, they have a small menu for a meal.
Final Thoughts
The hike from Sigchos to Isinlivi is the easiest of the trails on the Quilotoa Loop. It’s a great warm up and helps to show you what you’re getting into for the next two days of your hike.
Continue Your Adventure
Quilotoa Loop: The Quilotoa Loop is a three day hike. Day 1 is Sigchos to Isinlivi. Day 2 is Isinlivi to Chugchilan. Day 3 is Chugchilan to Quilotoa.
Ecuador: Spend one day in Quito, Ecuador’s capital city. From here you can visit Mitad del Mundo to visit the equator, take a day trip to Otavalo, or take a day trip to hike to Cotopaxi Base Camp. Visit Mindo and hike at the Tarabita Waterfalls. Baños is an adventure town, but I recommend a jungle tour. Don’t forget Cuenca, which I think is one of the prettiest towns in South America. Learn even more in my Ecuador Travel Guide.
Multi-Day Treks in South America: In Peru, you’ll find so many multi-day treks including the 4 Day Inca Trail and the 2 Day Colca Canyon. In Colombia, you can hike the 4 Day Lost City Trek.