The last day of the Quilotoa Loop involves hiking from Chugchilan to Quilotoa. The first two days of the trek are training for today. It’s not only the longest day of the trail, but it’s also the hardest. Today has minimal downhill and more than half of the trail is just one very long climb from the valley to the rim of the Quilotoa crater. The view is worth it, but that doesn’t meant make it any easier. And don’t forget, you’ll be hiking at high elevations during your climb.
Here’s what to expect on the hike from Chugchilan to Quilotoa.
What is the Quilotoa Loop
The Quilotoa Loop is a series of hiking trails connecting small towns in central Ecuador. It’s a popular trip for hikers visiting the country because it offers phenomenal views and a rewarding multi day trek.
Unlike many treks in South America, the Quilotoa Loop is unguided and you can travel at your own pace. You decide how many days you want to hike and where you would like to stay each night.
Traditionally, most hikers choose three days as they hike from Sigchos to Quilotoa, stopping in Isinlivi and Chugchilan along the way.
Hiking from Chugchilan to Quilotoa
Today is the longest and hardest day of the traditional three day route from Sigchos to Quilotoa. After a short downhill, it’s nearly five miles (8 kilometers) of uphill to reach the crater rim and another hour of hiking once you reach the rim.
Depending on where you stayed in Chugchilan, you’ll either have a long walk out of town or a short walk. I stayed at a hotel right near the main square so my hike was slightly shorter than others that I met, but I wasn’t the shortest. I recommend trying to find a hotel that’s in the center of Chugchilan just so you do more hiking on day 2, rather than on your last day.
You’ll follow the road out of Chugchilan but will pretty soon turn onto a trail leading to El Vaquero Hostel. You’ve likely seen signs for this hostel all over the trail and now you get to walk past it (unless of course this is where you choose to spend the night). There’s not much to note in terms of route finding on this section, but this trail will lead you back to the road. Yep. More road walking.
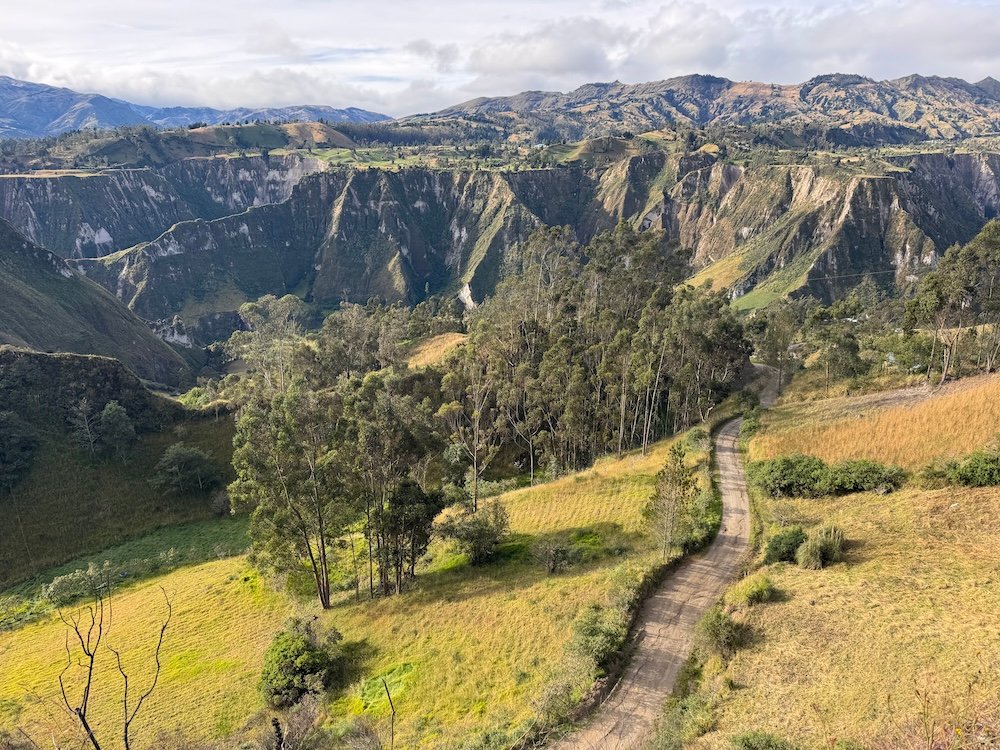
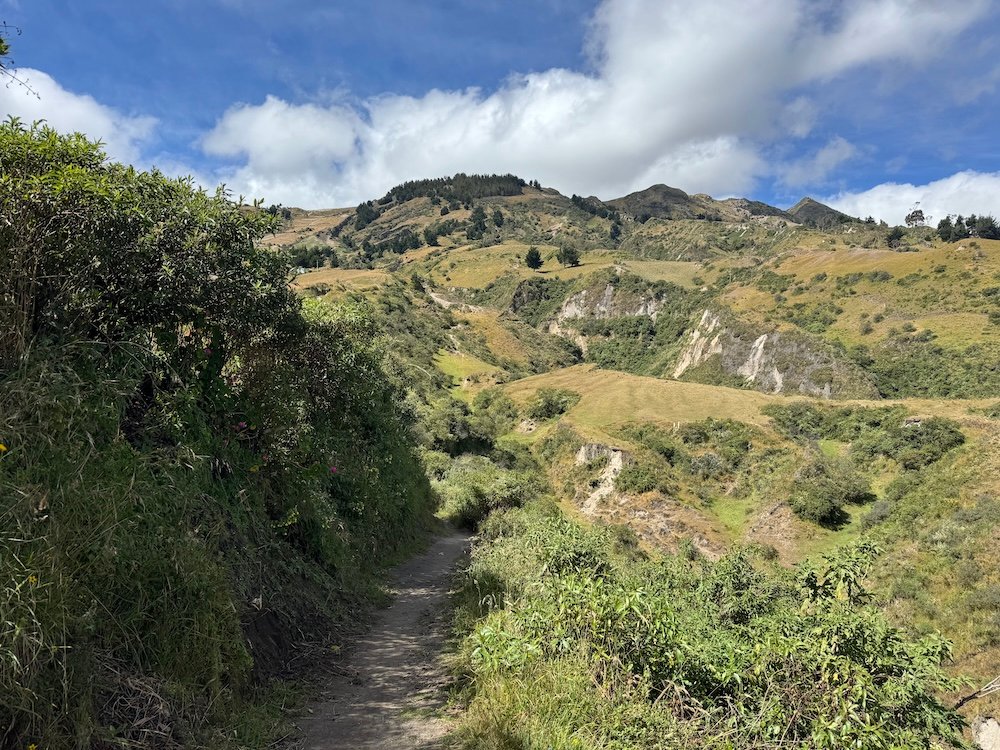
Just enjoy the downhills. It lasts for about 1.5 miles (2.4 kilometers) and then you’re done hiking any meaningful downhills on this trail. On that same note, enjoy the views of the valley around you. For the rest of the day you’ll be climbing and the landscape will change. After two full days of hiking through these valleys, it was weird knowing I wouldn’t be seeing them again.
It isn’t until about mile 2 (kilometer 3.2) where you’ll finally ditch the road and turn off onto a trail. By this point, you’re not only done with downhill, but you’re mostly done with flat. Sure, the walk around the rim of the Quilotoa Crater is Ecuadorian Flat, but it has a lot of up and down. Basically, prepare for a few miles of nonstop climbing.
Follow the trail for another 0.6 miles (1 kilometers) as you slowly climb through the valley. I’ll admit that I was moving particularly slow on the uphills this morning. I know I’m a slow uphill hiker, but these first ascents were killer for me. I don’t think they were particularly hard, but I wasn’t feeling the greatest at this point and that really makes hiking harder. But I pushed through and eventually reached another road. Follow this as you weave through the town of La Moya. It’s about as large as Itualo yesterday, but there were a few kids out who were happy to say hello to the gringos walking.
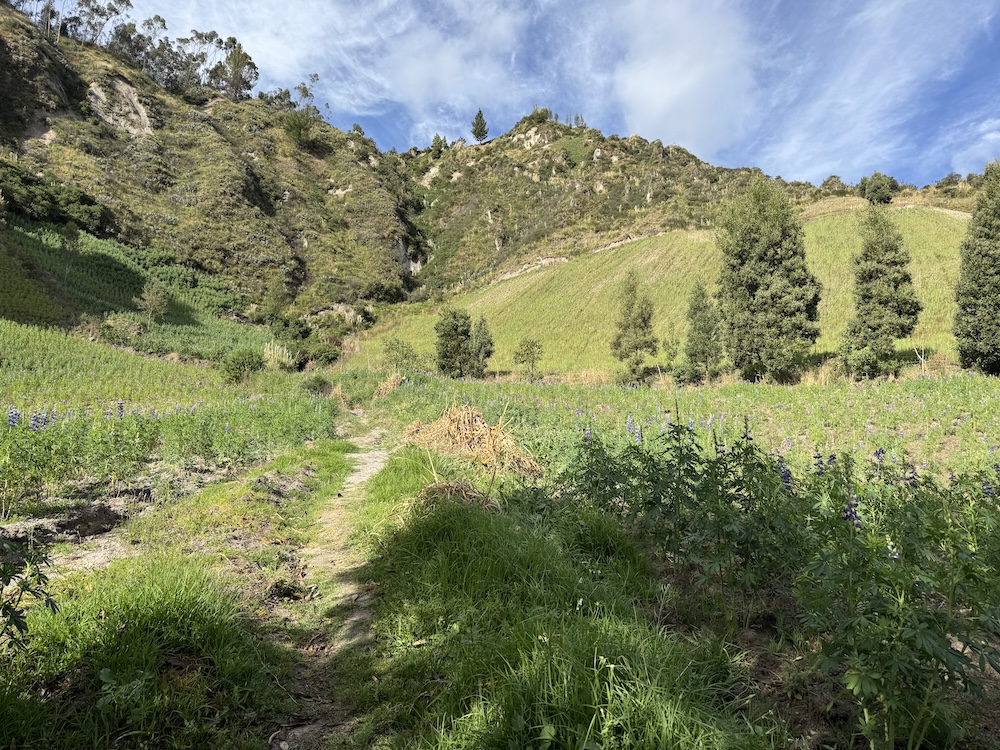
Shortly after La Moya, the route becomes trail again you’ll continue your slow ascent until you reach another road. The good news is that once you reach this road, you’re at 4 miles (6.4 kilometers) and about halfway done for the day. Woohoo! For me, I took a break at this section and thankfully felt so much better on the second half of the trail.
Follow the road to the left and into the town of Guayama. This is the last town you’ll pass before you reach Quilotoa. Like every town on the Quilotoa Loop, there’s not much here, but keep walking and following the road until it turns to trail at a hairpin turn (approximately mile 4.5/kilometer 7.25).
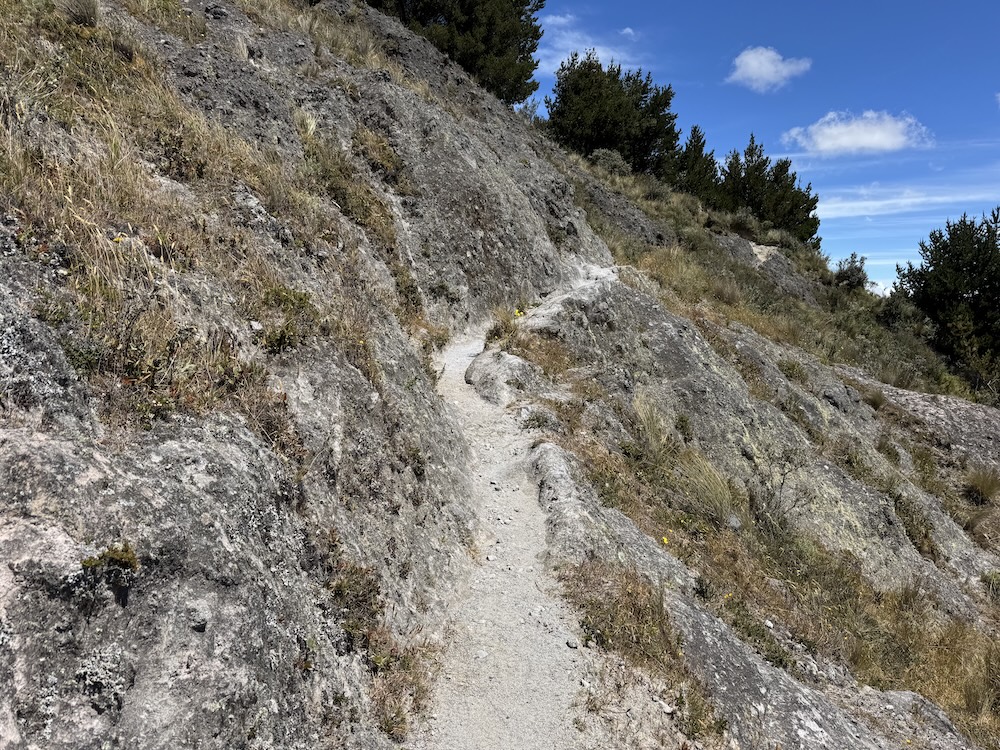
The trail lasts for about 0.8 miles (1.3 kilometers) before you get back to road. At this point, I don’t think it really matters much between road and trail. It’s just a very steady, never-ending uphill climb until you reach the top of the crater. I wish I could say that it’s not bad, but the climb just keeps going and it feels like that rim is never getting any closer. It kind of reminded me of the climb out of the Colca Canyon, but at least this climb was easier than that.
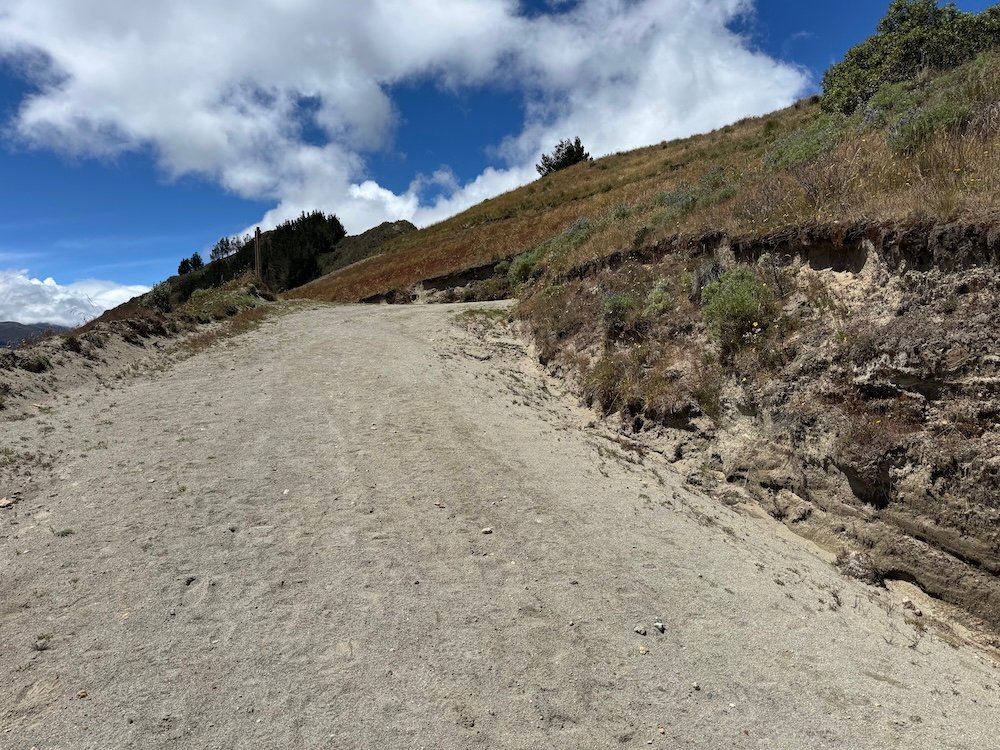
By now, it’s just one more mile to the rim of the Quilotoa Crater. My biggest advice here is to ignore whatever you find on AllTrails and follow the switchbacks on the road. For whatever reason, AllTrails shows a cut through the switchbacks, but it’s sandy and steep and just unpleasant. I regretted it about halfway up and talked to another hiker later who felt the exact same way.
She was actually a bit ahead of me and her group realized they made a mistake by following this path about halfway up. They wanted to be able to warn me, who was following behind, but had no way to do so. I ran into the same predicament and had no way to warn the people behind me. So the moral here is to follow the road and take the switchbacks. You’ll thank me later.
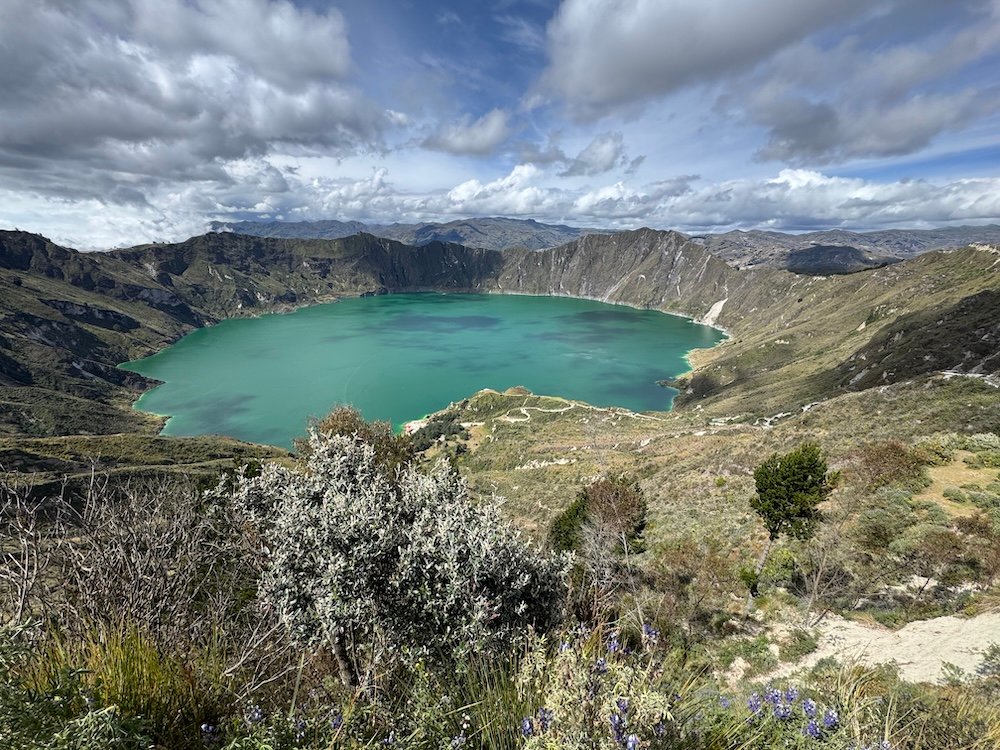
Finishing the climb, you’re finally at the rim of the Quilotoa Crater and can see the Quilotoa Lagoon. What an incredible sight. It’s a long three days of hiking, with a long climb today, but for a few brief moments, all of that goes away and you just say “wow!” as you look out to the lagoon.
Unfortunately, you’re not done and you still have to hike to the town of Quilotoa. You have two options. Normal people will turn right and follow the rim trail to Quilotoa. Overachievers can turn left and take the long route along the rim, which takes an additional two hours (or more!).
The “normal people” route takes another hour. Don’t get me wrong. You get great views of the lagoon (though you won’t be able to see the lagoon from every point on the rim trail), but it turns into a bit of a slog as you just want to finish the hike and it looks like the town of Quilotoa isn’t getting any closer.
Also note that it is incredibly windy along the Quilota Lagoon. The wind is strong and adds quite a bit of resistance as you try to hike. Be prepared.
Finally, you’ll enter the town of Quilotoa. I’ve read that you need to pay $2 to enter the town, but when I entered, no one was there to collect my money, so I just kept walking until I reached my hotel. I made it.
Total Hiking Stats
Distance: 8.3 miles (13.4 kilometers)
Elevation Gain: 4,065 feet (1,239 meters)
Elevation Loss: 1,808 feet (551 meters)
Lowest Point: 9,833 feet (2,997 meters)
Highest Point: 12,783 feet (3,896 meters)
Total Time: 5 hours 40 minutes (including a few very short breaks)
Should You Stay in Quilotoa After Your Hike?
This really depends on the person. Most of the hikers I met arrived in Quilotoa and immediately tried to find a bus back to Latacunga (though I’m sure some stopped for lunch in the town of Quilotoa before leaving). The last bus to Latacunga leaves at 5:00 pm, so it’s definitely an option to just head back toward Latacunga after finishing.
I spent the night in Quilotoa. I had debated for a long time about whether I wanted to stay or just go back to Latacunga, but in the end, decided to spend the night so I didn’t have to rush.
I’m glad I stayed. I was exhausted by the time I reached town and the idea of sitting on a bus for two hours to get to Latacunga sounded unpleasant. Plus, I feel like spending the night allowed me to mentally finish the hike. By staying, I felt like I got a true conclusion to the trail. And there was a great sunset in Quilotoa that night.
Final Thoughts
The hike from Chugchilan to Quilotoa is the hardest of the hikes on the Quilotoa Loop and that’s strictly due to what feels like a never ending climb to reach the Quilotoa Lagoon. The view from the top is worth it though and you’ll arrive feeling accomplished after your last three days of hiking.
Continue Your Adventure
Quilotoa Loop: The Quilotoa Loop is a three day hike. Day 1 is Sigchos to Isinlivi. Day 2 is Isinlivi to Chugchilan. Day 3 is Chugchilan to Quilotoa.
Ecuador: Spend one day in Quito, Ecuador’s capital city. From here you can visit Mitad del Mundo to visit the equator, take a day trip to Otavalo, or take a day trip to hike to Cotopaxi Base Camp. Visit Mindo and hike at the Tarabita Waterfalls. Baños is an adventure town, but I recommend a jungle tour. Don’t forget Cuenca, which I think is one of the prettiest towns in South America. Learn even more in my Ecuador Travel Guide.
Multi-Day Treks in South America: In Peru, you’ll find so many multi-day treks including the 4 Day Inca Trail and the 2 Day Colca Canyon. In Colombia, you can hike the 4 Day Lost City Trek.