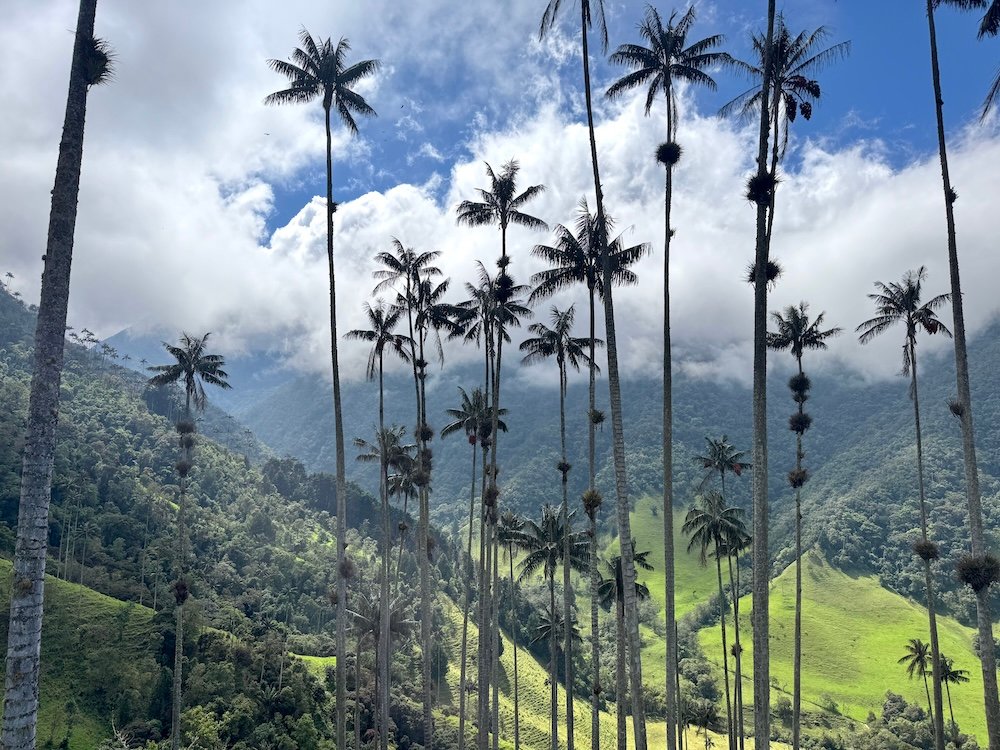
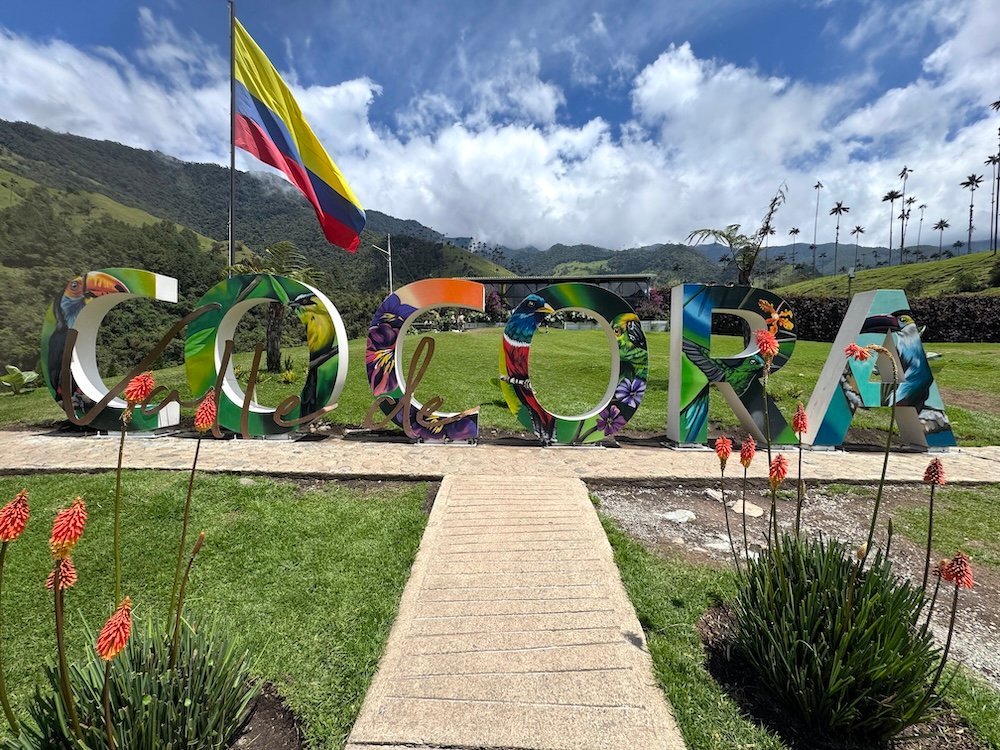
Salento frequently finds its way onto Colombia travel itineraries. While you can reach coffee farms from here, the main reason why most visitors come here is to hike in the Cocora Valley. Specifically, they want to do the Cocora Valley Trek, a 12 kilometer loop that winds through the gorgeous valley and features the tall wax palm trees. These palm trees are a symbol of the region and are also featured on the Colombian 100,000 peso banknote. Hiking among these trees is a bucket list item for many travelers.
So, in this guide, I’ll cover everything you need to know about hiking the Cocora Valley Trek.
How to Get to the Cocora Valley
Once you arrive to Salento, getting to the Cocora Valley is easy. In Salento’s main square, there’s a small hut. Go to that hut and purchase a ticket for the Cocora Valley. There’s no set times and the Willys will leave when they are full. What’s a Willy? It’s a modified jeep. The back seat was removed to have two sideways bench seats. Basically, it allows them to easily fit more people in the vehicle, which is great when you’re using them for tour vehicles.
And it’s not just sitting on those seats. As long as it’s not pouring rain, three people will stand on the back of the jeep and hang on as the Willy winds it way through the mountain roads. To an extent, it is scary (especially on some of those turns), but the views from the back of the Willy are incredible.
At the time of writing, a Willy ticket costs 6,000 COP one way from Salento to the Cocora Valley, though when you purchase your ticket, they’ll undoubtedly just charge you 12,000 COP and give you a return ticket right away.
Also important is to make note of when the last Willy departs from the Cocora Valley. It’s usually 6:00 pm, but it’s a good idea to confirm before you go (especially if you get a late start). If you miss the last Willy, you might be walking five miles back to Salento.
The Cocora Valley Trek
Note that this will refer to the long loop through the Cocora Valley. There is a shorter loop (that is also cheaper), that I’ll cover later in this article, but I’ll be focusing most of this on the long loop.
Entrance Fees
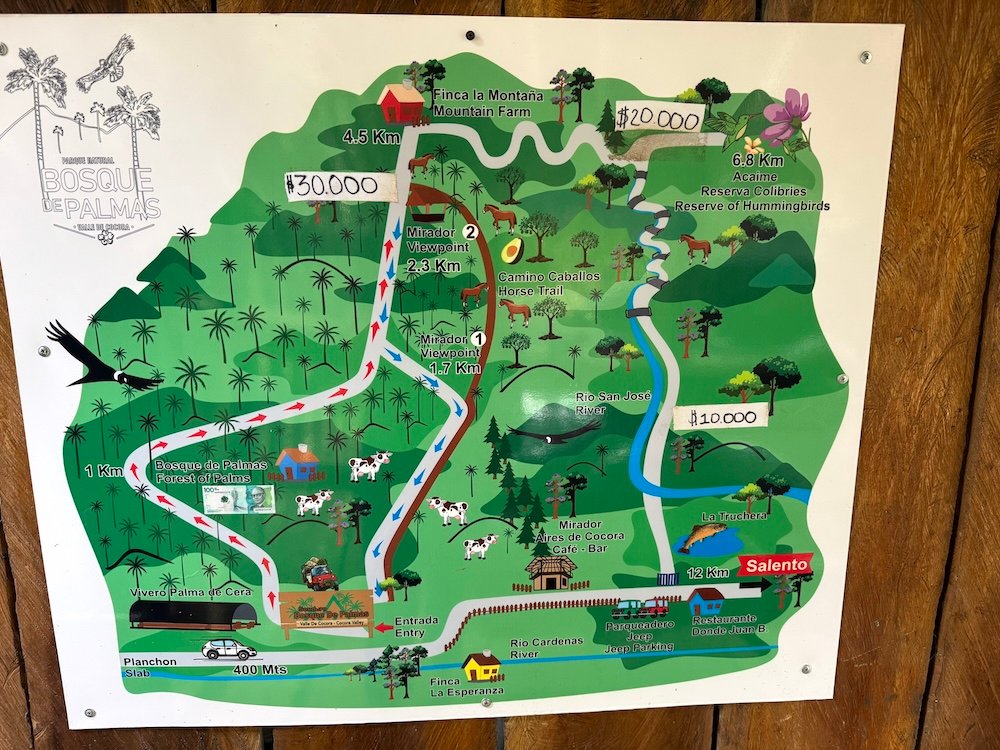
If you’re hiking the long loop, there’s three separate fees that you’ll need to pay. The order in which you’ll pay them depends on the route you take, but in general, here’s what you’ll need to pay.
Bosque de Palmas – 30,000 COP – If you’re hiking clockwise, you’ll pay this fee first. If you’re hiking counterclockwise, you’ll eventually pass a ticket booth where you’ll pay your fee and be given a wristband. Note that I wasn’t given a wristband when I started at Bosque de Palmas.
Acaime House – If you choose to hike all the way to Acaime House for the hummingbirds, you’ll pay a fee of 20,000 COP. Note that this fee isn’t paid until you reach the house, so theoretically, you could hike halfway through the cloud forest, then turn around, and not pay the fee. I’m not sure why you would do this though.
The Last Section – I don’t know if there’s really a name for this section, but I did have to pay 10,000 COP when I started my counterclockwise hike. Presumably, you’ll pay that fee at the end if you’re hiking clockwise.
So, in total, by hiking the long loop (with the inclusion of the Acaime House), I paid 60,000 COP. Note that everything had to be paid in cash, so make sure you have of cash on you.
Clockwise or Counterclockwise
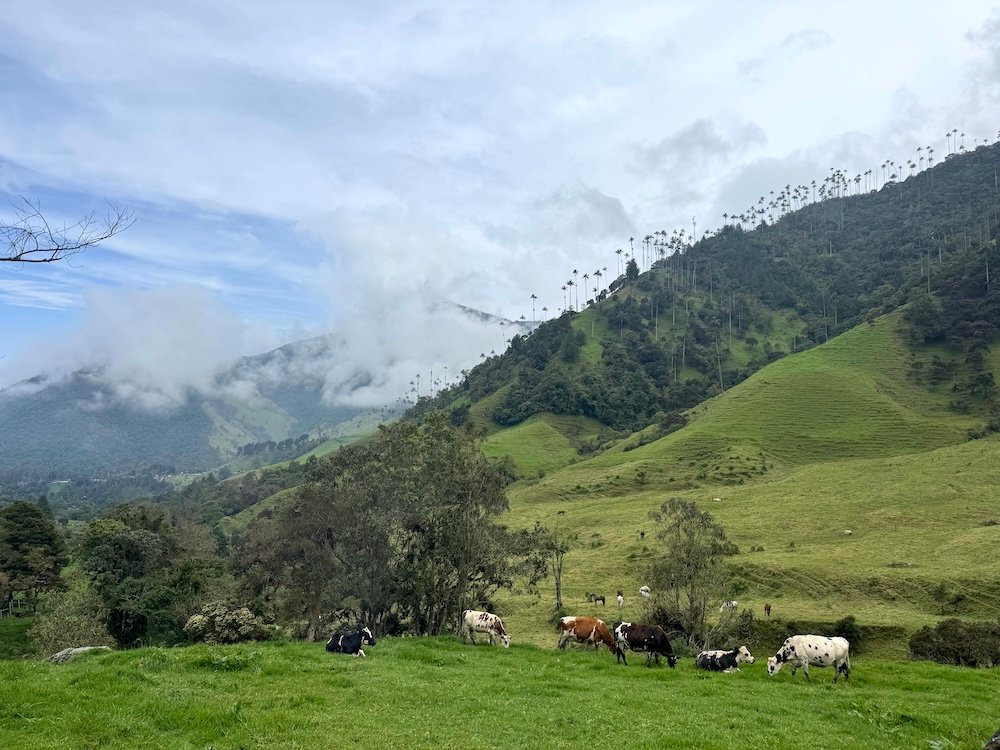
The Cocora Valley Trek makes a loop so it’s up to you which way you hike. Hiking clockwise starts you in the Bosque de Palmas with the most iconic views. You’ll hike up to the Acaime House and back down through farm land. Hiking counterclockwise is the reverse of this.
So which is better? Personally, I’d recommend hiking counterclockwise and this seems to be the general consensus among travelers. In my opinion, the section from Acaime House to the trailhead (not through Bosque de Palmas) is more difficult than the Bosque de Palmas. Do that while you have the most energy. In addition, going counterclockwise means that you’ll end with the best views.
What’s the Trail Like
As I talk about the trail, I’m going to explain it in a counterclockwise order, since that’s how I hiked it.
Trailhead to Acaime Cloud Forest
The trail starts off pretty easy—once you find the trailhead. From where the Willys drop you off, you’ll want to look for a sign that says “Hiking Information” on your right. This booth is set up for people who are hiking to a mountain peak, but it’s also where people who are hiking the long loop need to go. If you keep going straight (toward the Bosque de Palmas), you’ll end up hiking clockwise.
At first, it can feel like you’re not on the right path, but keep following it and you’ll eventually reach a fork in the road. Hikers to the mountain peak go right, everyone else who is just trying to hike the Cocora Valley Trek goes to the left. Now you’re on your way. Note that you will pass a booth and have to pay 10,000 COP to continue.
I found this first section to be the most muddy which is such a shame because it’s pretty flat and you’ll just want to make good progress. But take your time and try not to face plant into the mud.
After about 0.85 miles (1.3 kilometers), you’ll reach your first marker. It’s a small field with a trailer selling coffee, water, and snacks. If you need anything, this is your last opportunity to pick something up until you reach Mirador 2 in the Bosque de Palmas. There’s also some nice views nearby.
As you leave this area, watch the trail. Do not go through the gate, even if it’s open. That’s not the correct way (ask me how I know). Instead, follow the trail to the left of the gate where you’ll begin your uphill climb. It’s a steady uphill for another 1.65 miles (2.65 kilometers) where you’ll gain about 800 feet (243 meters). Along the way, you’ll leave the farmland behind and enter the forest where you’ll use bridges to cross the river. And yes, there was still a decent amount of mud in this section as well.
Acaime Cloud Forest
I’m breaking out the Acaime Cloud Forest as its own section because if you wanted, you could completely skip this section. It’s an extra spur that takes you to the Acaime House where you can view hummingbirds and get some hot chocolate. From this point in the trail, it switches to an out and back.
In total, going to the Acaime House and back to the trail adds 1.3 miles (2.1 kilometers) of hiking, plus 400 feet (121 meters) of elevation gain and decrease. I wouldn’t say that the trail is hard, but it’s a steady uphill with a few muddy sections. Whether you hike in the Acaime Cloud Forest is up to you, but do note that when you reach the Acaime House, you’ll pay a 20,000 COP fee (which includes your hot chocolate and cheese).
So is the detour to the Acaime House worth it? I’m on the fence. On the one hand, I’m glad I visited because it felt like part of the experience, but on the other hand, if I were to hike the Cocora Valley Trek again, I would skip the visit here.
Acaime Cloud Forest to Bosque de Palmas
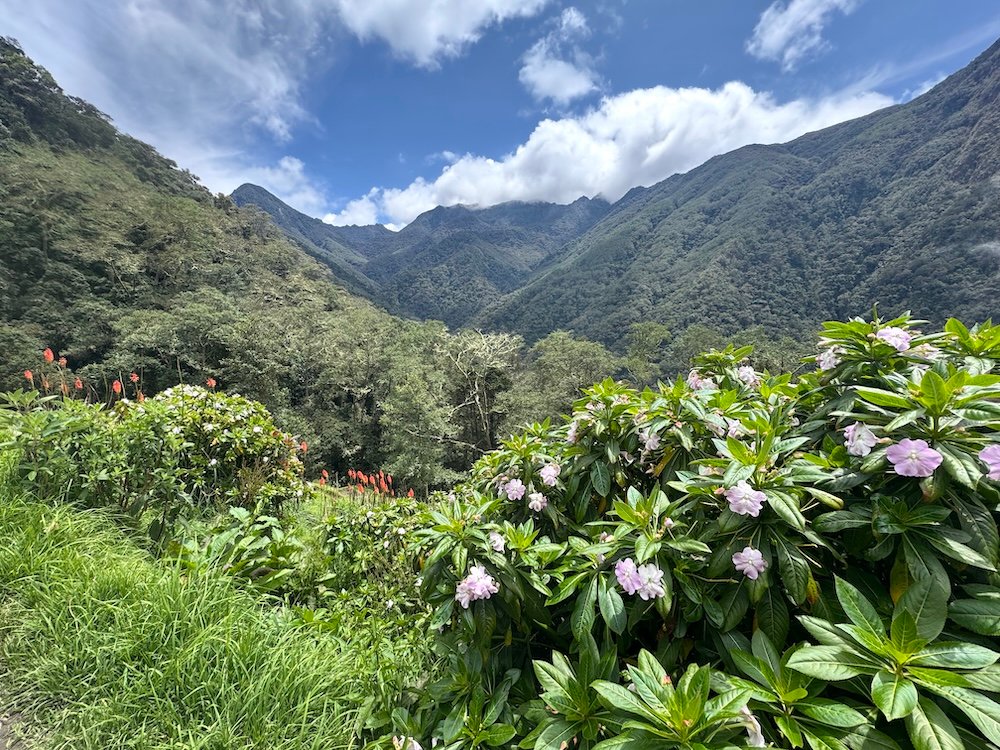
When you leave the Acaime Cloud Forest and join back up with the main loop, it’s time to keep climbing. There’s another 0.6 miles (1 kilometer) and 600 feet (182 meters) until you reach the highest point of the trail. The view up here is great and I hope that provides just enough motivation for you to keep going.
The highest point is near a local farmer who will offer coffee or hot chocolate if you’re interested. For me, I just sat on the trail for a few minutes to take in the view. It’s the highest point of the trail, so it’s all downhill from here (but the best views are yet to come).
Continue down the trail for 0.4 miles (0.65 kilometers) where you’ll pay your fee to enter the Bosque de Palmas. This is the section you’ve been excited for and it’s finally time to enter.
Bosque de Palmas to the Trailhead
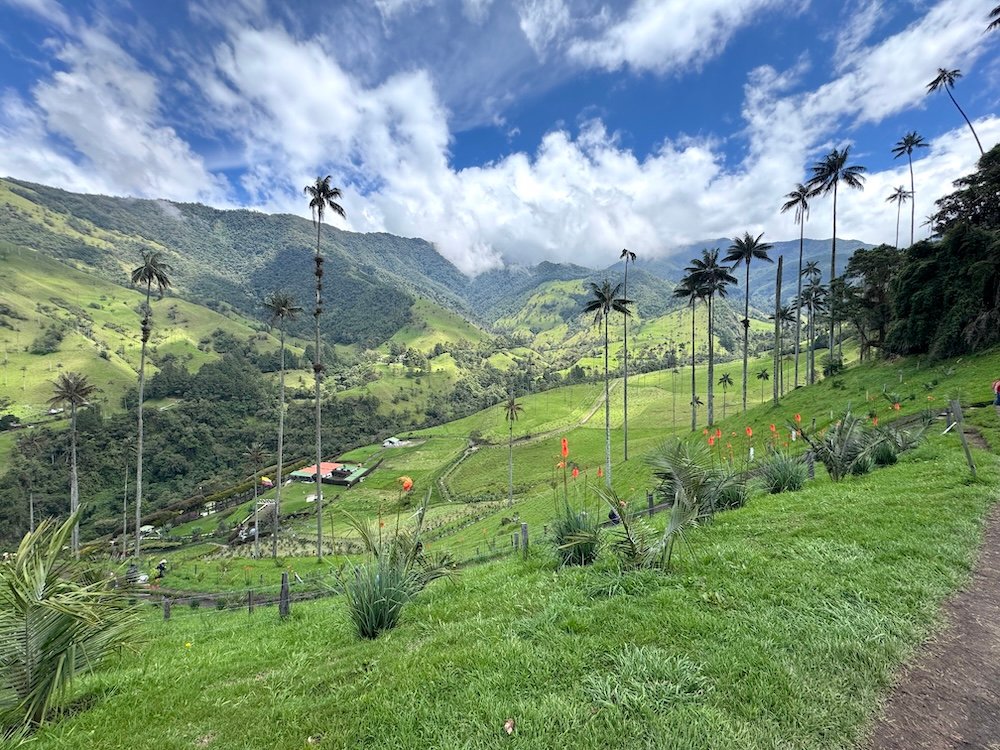
About one mile (1.6 kilometers) further down the trail, you’ll finally hit Mirador 2. This is the higher of the two viewpoints in the Bosque de Palmas and it’s one of the first times you’ll really get those views of the wax palm trees. There’s a few spots here and there where you’ll see them as you come down the trail, but here’s where you can really get close. At Mirador 2, there’s also a stand selling drinks and snacks if you need them.
Continuing on from Mirador 2, it’s another 0.4 miles (0.65 kilometers) to Mirador 1 which has even more views. It’s hard to say which viewpoint I like better, but know that both are worth a stop.
It’s also important to note that if you follow the route on AllTrails, the Cocora Valley Loop doesn’t go past Mirador 1. If you follow AllTrails, you’ll end up on a loop through the Bosque de Palmas, but it’s the loop that is recommended for people to start their journey. Personally, I think going through Mirador 1 and finishing the trail through that viewpoint offers the best views, but it’s your choice.
From Mirador 1, it’s about one mile (1.6 kilometers) back to the starting point.
My advice is to try to savor the Bosque de Palmas. I had to rush through the area on my Cocora Valley Trek because when I stopped at the highest point of the trail, I heard cracks of thunder. I made it through most of the trail without getting wet, but it started pouring just after I exited the Bosque de Palmas and made my way toward the Willys. I returned a few days later and hiked the short loop through the Cocora Valley, just to savor the views and enjoy it and wow, it really is something special.
A Note About the Mud
Obviously the level of mud depends on when you visit. During rainy season, it’ll be an almost guarantee, but I think you should be prepared for mud at all times. Specifically the section from the trailhead to Acaime House (the first half of the trail for those hiking counterclockwise) can get very muddy. Be prepared.

How Difficult is the Cocora Valley Trek?
I’d say the trail is moderate to difficult. For me there were two things that made the trail challenging: the altitude and the mud.
I can hike just fine, but I know that I’m always much slower on the uphills. That is magnified when I start getting higher and higher in elevation. The Cocora Valley Trek starts at 7,800 feet (2400 meters) above sea level and gets up to over 9000 feet (2740 meters) above sea level.
The other thing that added to the difficulty was the mud. It was frustrating because I wanted to be able to hike faster, but with the mud, I was forced to go slower and take my time (unless I wanted to get absolutely covered with mud—which I didn’t).
So in the end, I’d call it moderate to difficult. The trail conditions will play a massive role in how hard the trail is.
How Long Is The Cocora Valley Trek?
On my Cocora Valley Trek, I logged 7.25 miles, which is about 11.5 kilometers. With that distance, I also gained 2,300 feet of elevation, which is about 700 meters. Keep in mind that you’ll start at about 7800 feet above sea level, or nearly 2400 meters above sea level. It doesn’t sound that high, but even that is enough to make you huff and puff a bit more than you normally would.
As far as how long it takes to hike, I’d give yourself five hours. That’s what it took me to hike. I took several stops for photos and two slightly longer breaks (one at Acaime House and another at the highest point on the trail). I did rush a little bit at the end because I started hearing thunder and was determined to finish before the rain (I almost succeeded).
That said, the trail conditions will have a massive impact on your hiking time. I watched a YouTube video where the creator said that they did it in “three hours and we stopped loads”. Either we did completely different trails or they had vastly different trail conditions. The first half of trail was pretty muddy and that made it slow going in parts. I wanted to go faster, but it was just impossible with that mud.
Do You Need Hiking Poles for the Cocora Valley Trek?
This is up to the individual person. Since I’ve been dragging my hiking poles all over South America so I have them on my longer treks, I decided to bring them on the Cocora Valley Trek. I enjoyed having them, but that was more because they gave me extra stability with the mud. I brought both, but I only ever used one of my poles.
There were a lot of people on the trail and hiking poles were not common. So in general, it looks like no, but if there’s been a lot of rain recently and you have your hiking poles with you, bring one along for stability.
Is the Cocora Valley Trek Worth It?
Yes, the Cocora Valley Trek is worth it. It’s a unique hike that offers incredible views of the surrounding landscape.
Other Hiking Options in the Cocora Valley
If you don’t want to do the long loop, but still want to visit the Cocora Valley, consider hiking the short loop which consists of hiking through the Bosque de Palmas. Because I didn’t have the greatest weather for the Bosque de Palmas when I did the long loop, I returned to the Cocora Valley on my last day in Salento and hiked the short loop.
The short loop is 2.75 miles (4.5 kilometers) and has 800 feet (240 meters) of elevation gain. This loop goes much faster and without stops, it took me about an hour and 15 minutes to hike. I found this trail to be easier and less muddy. If you’re not a big hiker and just want some of the most iconic views, consider just hiking the short loop.
Note that if you wanted, you continue climbing from Mirador 2 and go all the way to the highest point on the trail. If you do that as an out and back hike, you’ll skip a lot of the mud, but you’ll miss the Acaime House.
More in Salento
Salento is a small town that’s known as the gateway to the Cocora Valley. If I’m honest, there’s not a lot to do in the town itself. There’s shopping and plenty of restaurants, but the town itself is light on sights. However, it’s the perfect base for exploring not just the Cocora Valley, but also the surrounding area.
Nearby is the even smaller town of Filandia. It’s another colorful town with some great views and can be a nice way to spend half of a day.
Salento is part of Colombia’s coffee region so nearby you’ll find coffee farms offering tours.
And of course, there are even more hikes that you can do in the area. Tour agencies are abundant in Salento for those wanting to do something even more.
How to Get to Salento
There is no airport in Salento so you’ll have to take a bus to reach the town. Direct buses are limited so you may find yourself connecting in a larger nearby town.
Many travelers will connect through Armenia. Buses between Armenia and Salento depart every twenty minutes or so. The journey takes about an hour and costs just 8000 COP. Find your bus at the Armenia bus station or the Salento bus station (though you can also flag it down anywhere along the route).
There are also buses to Pereira, but these depart less frequently.
If you’re coming from Medellin, the bus company Flota Occidental operates daily direct buses between Salento and Medellin’s south bus terminal. If this is the route you’re taking, I highly recommend checking the schedule to try to get this bus. It’s just so much more convenient if you don’t have to transfer buses.
Final Thoughts
While the Cocora Valley Trek might be slightly more challenging than you might expect (particularly if there is recent rain), it’s absolutely a worthwhile hike. Through farmlands, cloud forests, and of course the wax palm trees, what more could you ask for in a hike?
Continue Your Adventure
Nearby: If you have extra time in Salento, consider a visit to the smaller town of Filandia.
More Hiking in Colombia: Colombia has no shortage of hikes. In San Gil, day trip to Barichara to hike the Camino Real. In Villa de Leyva, you can hike Cerro de la Cruz for views of the city. Jardin is my favorite town in Colombia and has a plethora of great hikes. For those wanting a longer, multi-day adventure, try the Lost City Trek.
Colombia: Start planning your trip with my Colombia Travel Guide which includes a realistic travel budget, my top travel tips, safety information, a nine day itinerary, and so much more.