
Yosemite National Park has so much to offer tourists from epic views to long and exciting hiking trails. You could spend weeks here and never run out of things to do. However, this guide assumes that you only have two days at Yosemite National Park. You’ll be able to see the highlights and venture a bit beyond the busiest stops, but you still won’t see everything. Still, for those visiting Yosemite for the first time, this is an awesome itinerary.
Two Days at Yosemite National Park
This itinerary is based loosely off the itinerary my mom and I followed on our trip to Yosemite National Park. I’ve rearranged a view things to make it more efficient and to fit some additional activities in. That’s not to say that my itinerary was bad, but rather it absolutely could have been more efficient.
Day One – Yosemite Valley
Your first day at Yosemite National Park is all about epic and iconic views. You’ll get a chance to do a bit of hiking, but those iconic views will definitely be a huge focus.
8:00 – Arrive at Yosemite National Park
You’ll want to arrive early at Yosemite National Park. In fact, if you can, I’d recommend arriving even earlier than 8:00 am. The park gets very busy and the earlier start you get, the fewer crowds that you’ll see (although there will still be crowds).
8:15 – Mariposa Grove
The first stop is just past the entrance and it’s at Mariposa Grove. Unfortunately I don’t have any first hand experience here because I tried to visit in the afternoon on my way out of the park. This was a mistake because the parking lot here was completely full. So by starting your day at Mariposa Grove, you hopefully won’t run into the same issue I did.
Mariposa Grove is an area full of sequoia trees. If you’ve also visited Sequoia National Park on your vacation, you may see some similarities since both Mariposa Grove and Sequoia National Park highlight the same type of trees. But get out and explore and take in your first glimpse of Yosemite National Park.
9:15 – To Taft Point
Once you finish at Mariposa Grove, it’s time to jump back in your car. Head further into the park, turning off on Glacier Point Road. This road brings you up into the mountains and toward some incredible views.
I recommend going to Taft Point first. It’s the one of three views that we’ll stop at, but it’s the first you’ll pass. If you don’t see a parking spot, just continue driving and try again on your return from Glacier Point. Keep in mind that there are two parking lots for Taft Point. It doesn’t matter which lot you use, so just find an open parking spot and hike from there.
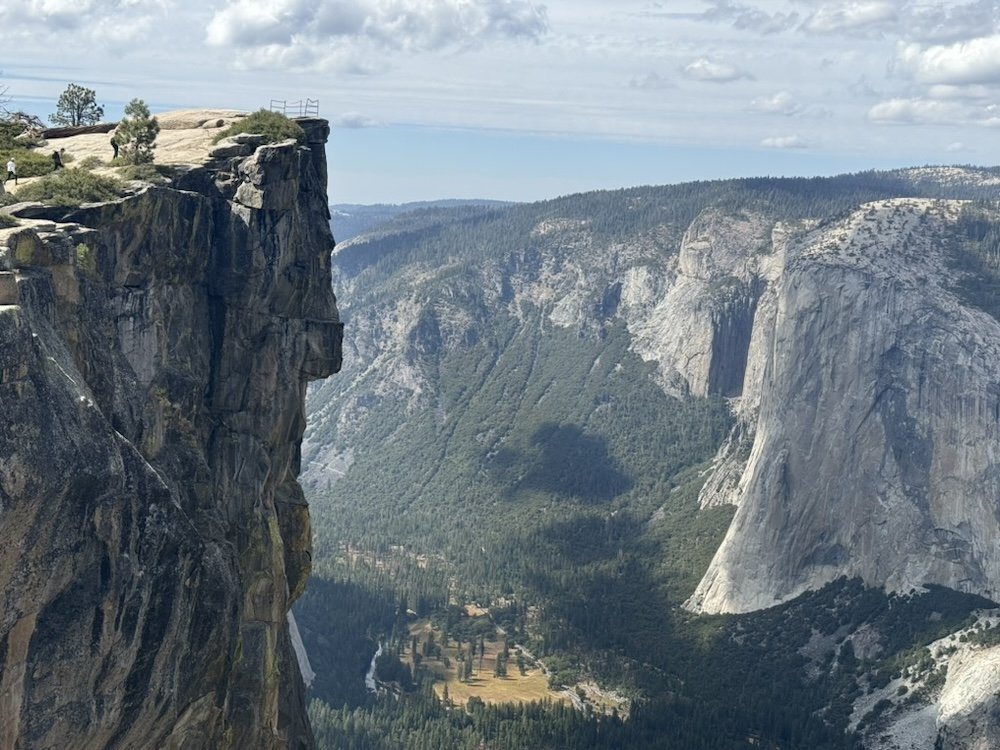
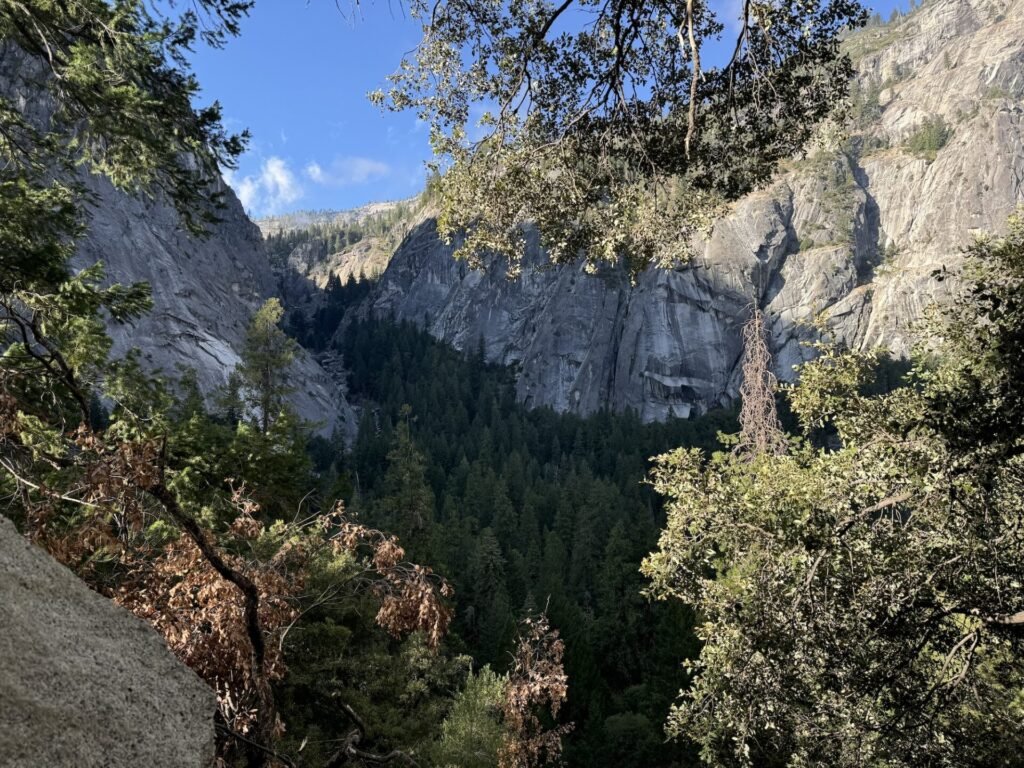
10:15 – Taft Point
Taft Point has an excellent view of the mountains, but to get there, you’ll have to hike out. Trust me when I say that the hike is worth it. This may have been my favorite hike that I did at Yosemite National Park (to be fair, all of the hikes to waterfalls were nice, but water levels were dramatically low) and I recommend it to anyone who is able to make the hike.
On my hike to Taft Point, I logged 2.5 miles and 377 feet of elevation gain. It took my mom and I just over an hour which includes plenty of time to stop at Taft Point for photos and to enjoy the view. The hike itself is not very difficult and while there are several uphill sections, nothing felt particularly steep. However, you’ll start your hike at 7,000 feet so if you aren’t used to the elevation, you may find yourself huffing and puffing on what you feel like should be easy uphills.
11:15 – To Glacier Point
After your hike to Taft Point, get back in your car and drive all the way to the end of Glacier Point Road.
As a note, I was following Google Maps and it told me that I had arrived before I actually did. At the time I visited, the road on Google Maps didn’t seem to extend all the way out to Glacier Point. Don’t freak out if Google tells you that you’ve arrived and it seems like the middle of the road. Just keep driving until you reach the Glacier Point. It’s at the end of the road and it’s impossible to miss. You’ll know when you’ve actually arrived.
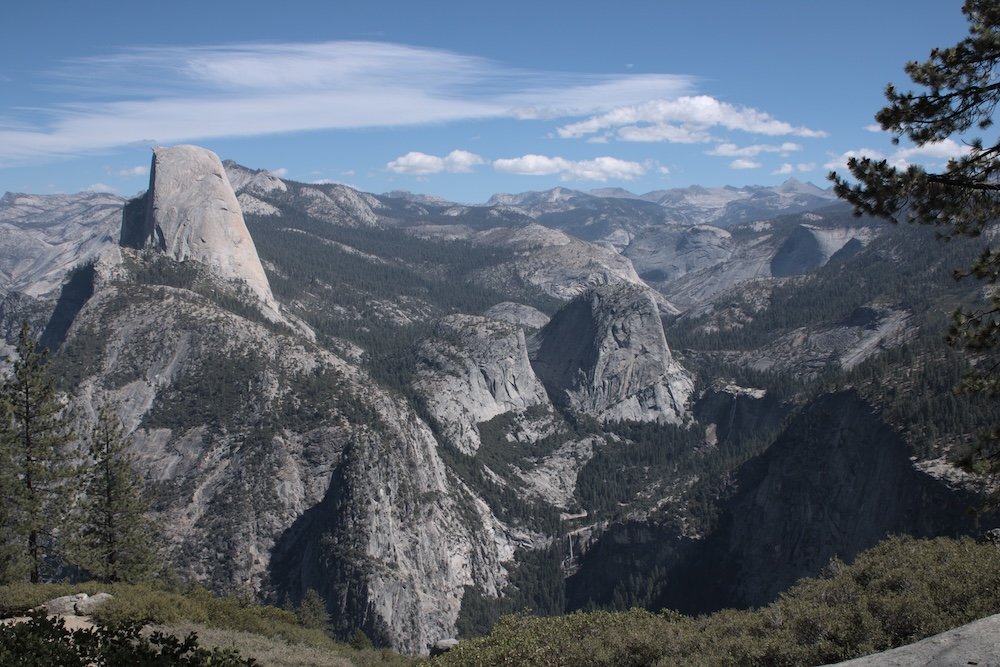
11:30 – Glacier Point
The parking lot is pretty big, but you may still have to hunt for a spot. From the parking lot, you’ll have to walk a short distance to get out to the viewpoints. But once there, there are so many different angles of the surrounding mountains, including Half Dome. It’s pretty incredible.
12:00 – Washburn Point
Washburn Point is just down the road from Glacier Point and it offers, in my opinion, a less chaotic view of the surrounding mountains. The parking lot at Washburn Point is smaller so only so many people can be here at one time.
However, it’s totally worth a stop at Washburn Point, even if you already have plans (or have stopped) at Glacier Point. Yes the views are somewhat similar, but it’s really hard to get tired of these views.
12:15 – To Tunnel View
After Washburn Point, we’re done on Glacier Point Road (unless you had to reorder and do Taft Point at the end). Head back the way you came to get back to the main highway. Turn right and continue further into Yosemite National Park.
1:00 – Tunnel View
Most of the roads through Yosemite National Park hug the side of mountains. There’s one exception and that is a tunnel that cuts straight through the mountain. While the tunnel itself is unremarkable for tourists, there is a pull out on the eastern end of the tunnel. This is known as Tunnel View and it is a spectacular viewpoint.
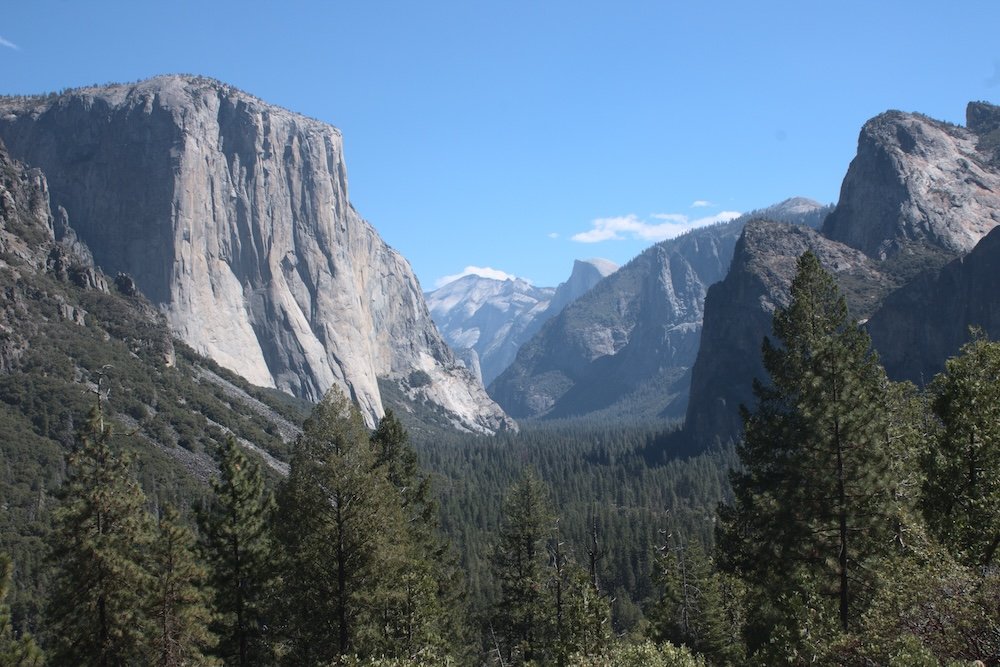
A word of warning is that this area gets busy. We didn’t have a problem finding a spot to park, but I mention it’s busy because there are places to park on both sides of the road. As a result, there are plenty of tourists crossing the road and you need to pay attention. Signs are posted to warn you. While this isn’t something I’d normally comment on, the views and parking lots are immediately after the tunnel, so as your eyes adjust to the brightness outside, you also need to be aware of tourists who may not be using common sense when crossing the street.
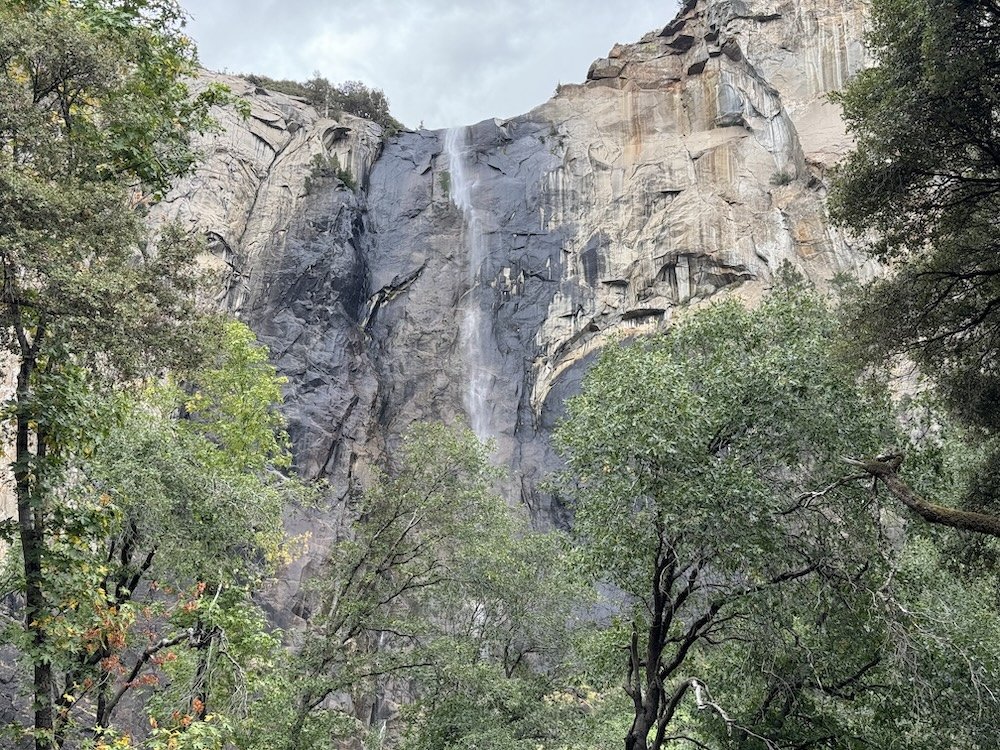
1:15 – Bridalveil Falls
This waterfall towers over the trees and flows off the cliff in such a way that it can resemble a bride’s veil (although to be clear, I think all of the waterfalls give this appearance). There is a parking lot here, but like so many other parking lots at Yosemite National Park, be careful because it is busy. From the parking lot, there are a handful of short trails that take you to different vantage points of Bridalveil Falls.
We visited in mid September and Bridalveil Falls was nearly dry. There was just a small flow of water. However, because of the wind, it gave a cool illusion of a small, thin piece of fabric blowing in the wind. I’d imagine that it’s more impressive in the spring and early summer months.
1:30 – Yosemite Valley
Yosemite Valley is the most popular area of Yosemite National Park. This where you’ll find some of the best views. It’s a hub for big hikes, viewpoints, and so much traffic. Inside Yosemite Valley, you’ll be able to see towering waterfalls and giant mountains. The famous El Capitan is located here and depending on the day, you might even spot some rock climbers.
So what are you going to do in Yosemite Valley? Well, it depends what time you get here and what traffic looks like. I recommend tackling one of these three items. We’ll be back at Yosemite Valley tomorrow morning so you can do the other two tomorrow. But for now, pick one and if you have more time and energy, you can do more.
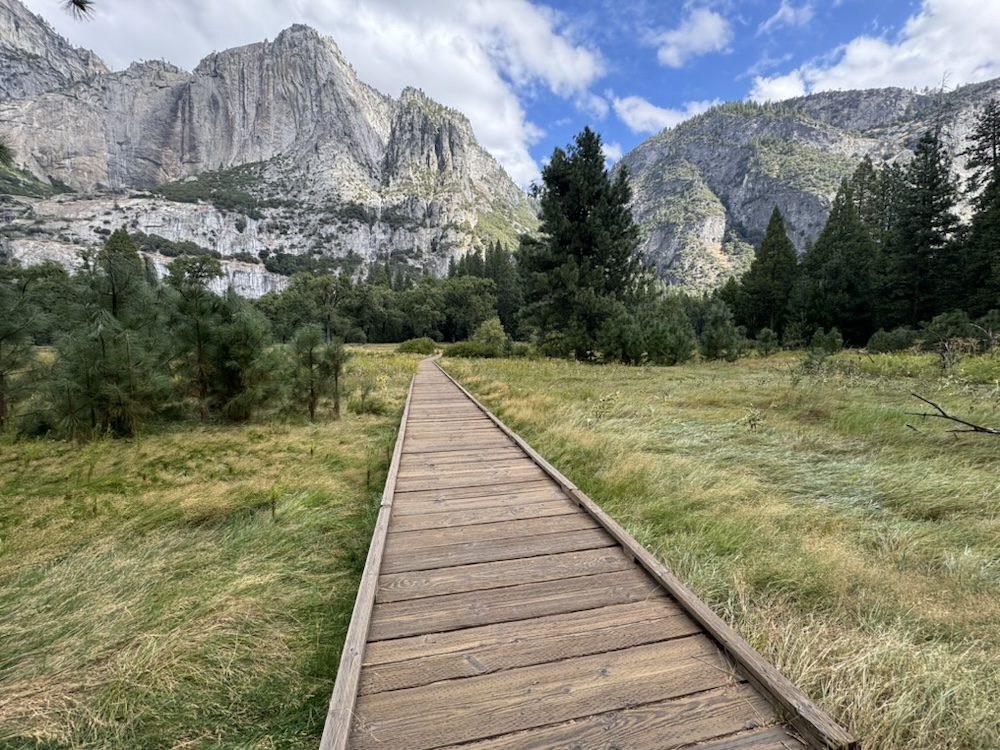
Option 1 – Cook’s Meadow
One of my favorite experiences at Yosemite National Park was strolling through Cook’s Meadow. I’m hesitant to even call this a hike because it was almost completely flat and there was a boardwalk for most of it.
So what’s so great about Cook’s Meadow? It’s the views of Yosemite Valley. Sure, you can see so many mountains from all over the valley, but I feel like Cook’s Meadow was special. As you stand in the meadow, turn around a full 360 degrees and just appreciate the jaw dropping beauty at every single angle. Seriously, there is no bad views.
The Cook’s Meadow Loop is a one mile trail that’s almost completely flat. This will be the fastest and easiest of the three options. I’d give yourself about 30 to 60 minutes depending on how much you want to savor the views.
Option 2 – Lower Yosemite Falls
Depending on where you visit in Cook’s Meadow, you won’t be too far off of Lower Yosemite Falls. If not, jump on the shuttle or drive to the Lower Yosemite Falls stop.
Yosemite Falls is a massive waterfall and you can’t hike to the very top of the falls in just an afternoon. So instead, just visit Lower Yosemite Falls. This waterfall is much more accessible and I think it’s a great way to get up close to one of the many waterfalls with minimal effort.
Note that if you are traveling late in the season, the falls may be completely dry. If that’s the case, it doesn’t even pay to stop.
Option 3 – Vernal Falls Footbridge
The trail to the top of Vernal Falls is too much for one afternoon. Plus with the short time frame in the park, I’m hesitant to include the entire trail at all. You’ll need a full day to do this trail so instead, I’m suggesting that you just do part of the trail.
As you hike to the trail, you’ll eventually reach a footbridge. Once you cross the footbridge, the trail diverges and you can either follow the Mist Trail or the Muir Trail to Vernal Falls. However, if you stop at the the footbridge, you can get a view of Vernal Falls. This is what my mom and I chose to do and it gave us a view of the waterfall without overexerting ourselves or taking an entire day of our itinerary.
Option 4 – Columbia Rock on the Yosemite Falls Trail
Like the trail to Vernal Falls, the trail to Yosemite Falls takes a full day. Your reward is reaching the top of the falls and all of the views that come with it. But you don’t have to go all the way to the top of Yosemite Falls for great views.
During my visit, Yosemite Falls was dry. There was no waterfall, but that didn’t stop people from hitting the trail (although it didn’t seem like most of those hikers knew that Yosemite Falls was dry). So instead of hiking all the way to a non-existent waterfall, my mom and I hiked as far as Columbia Rock. You’ll gain 1000 feet of elevation within a mile, but your reward is a sweeping view of Yosemite Valley.
If it’s a hot day, I’d be hesitant to do this trail in the afternoon. While the sun can be bright and not make for the best photos, I still recommend hiking the trail in the morning. It’s just a more pleasant hiking experience. But ultimately, the choice is yours.
Finishing Your Day
When you’re done in Yosemite Valley, exit the park, grab a well earned dinner, and prepare for another day exploring Yosemite National Park.
Day Two – Beyond Yosemite Valley
On the second and final day of this itinerary, we’ll revisit Yosemite Valley but also head to the lesser visited Tuolumne Meadows.
8:00 – Yosemite Valley
Your morning starts back at Yosemite Valley. Because you’re getting an early start, hopefully traffic is lighter and therefore it’s easier to explore the valley. Spend the morning doing the hikes that you didn’t quite get to yesterday afternoon. When you’re done, we’ll leave Yosemite Valley behind and head to a less visited scenic drive.

11:00 – To Tioga Road
After Yosemite Valley, head north to reach the start of Tioga Road. It will take you about an hour to get from Yosemite Valley to Tioga Road so stop at the bathroom, get a snack, and get ready for a drive.
12:00 – Tioga Road to Tuolumne Meadows
Tioga Road is a scenic drive that takes you out toward Tuolumne Meadows. This area was on my list for Yosemite National Park, but due to scheduling and not the greatest time management, I didn’t make it out here.
However, photos look gorgeous and it’s high on my list for my next visit to Yosemite National Park. Note that the scenic drive continues on beyond Tuolumne Meadows, but our destination is the meadows.
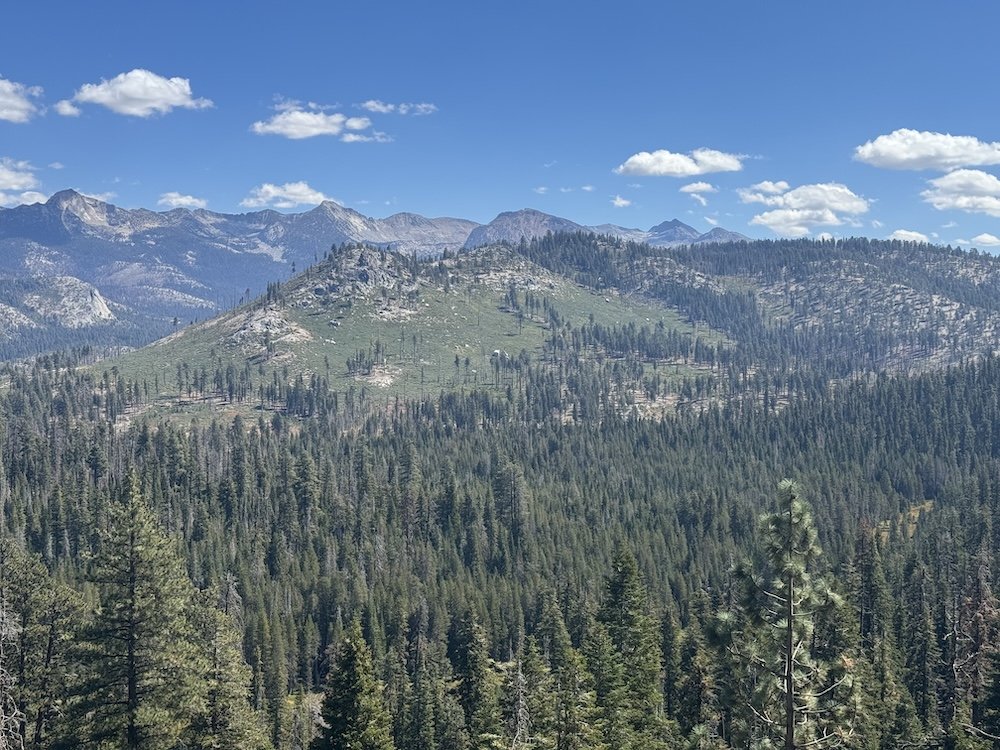
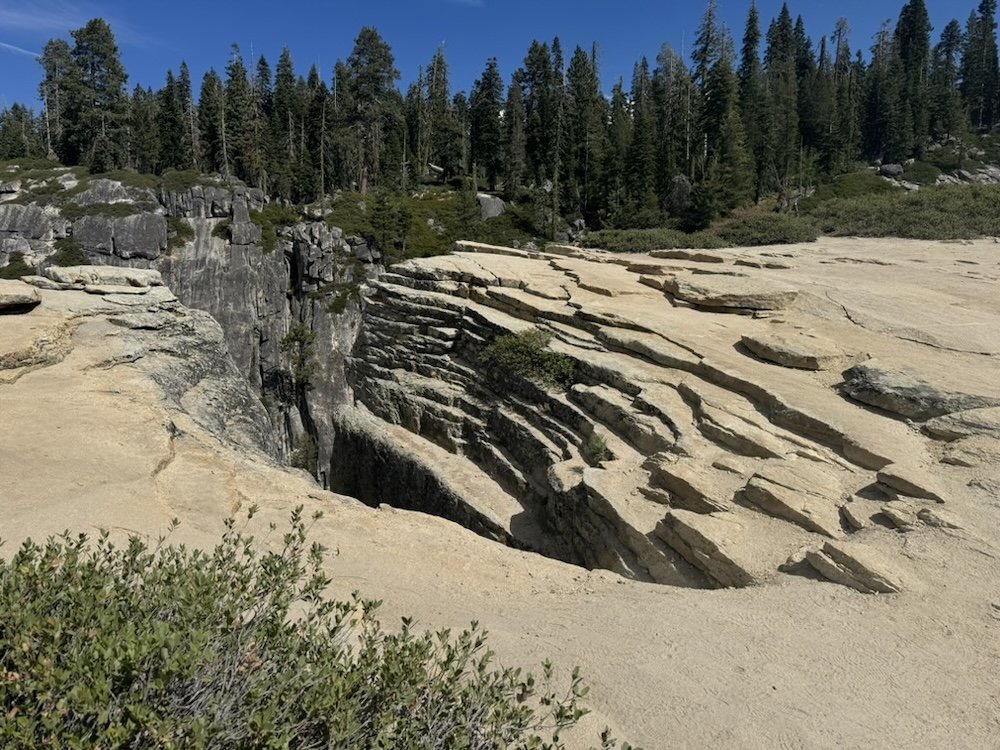
1:30 – Tuolumne Meadows
After more driving, it’s finally time to get out and hike. There are several trails located within Tuolumne Meadows, so pick one that looks interesting and start hiking. How long you hike is up to you, but just remember that you’ll have a bit of a drive to exit the park one you finish.
With More Time
If you have more than two days at Yosemite National Park, I’d look at adding in one of the longer hikes. If you’re here while the waterfalls are flowing, I’d recommend either hiking to Yosemite Falls or Vernal Falls.
With Less Time
With less than two days at Yosemite National Park, you’ll have some serious cutting to do to get down to a one day itinerary. But I’ve already written a guide of how to do it. There will be less hiking and Tioga Road will have to be scrapped entirely, but you’ll still be able to see the most iconic sights.
When to Visit Yosemite National Park
Yosemite National Park can be visited all year round but some months are better than others.
Summer is peak travel time, but it’s also when you’ll have great weather. Winter is low season where you’ll find fewer people, but you’ll also have less to do as some of the roads close during this time.
Spring and fall are shoulder season and tend to offer a balance between good weather (although this isn’t guaranteed) and manageable crowds.
One thing to consider is the waterfalls. If seeing some of the powerful waterfalls is high on your list, I recommend aiming for late spring or very early summer. As summer moves into fall, the water dries up and the falls decrease in power.
I visited in mid September and while I had excellent weather, every waterfall was either completely dry or very low. Crowds were mostly manageable and the only thing we had to skip was Mariposa Grove as we couldn’t get into the parking lot (more on this later in my tips about managing crowds).
Where to Stay on Your Visit to Yosemite National Park
You have many options when it comes to lodging in and around Yosemite National Park and much of it is determined by how much you are willing to spend.
There are lodges and hotels within the park, but these book up well in advance and can come with heavier price tags. If you’re on a budget, consider looking a bit further afield for your hotels.
Our visit to Yosemite National Park lasted for two days. We spent the night in Fresno before getting up very early to drive and reach the entrance to Yosemite National Park at 7:00 am. Then we spent the night in Mariposa. After our second day at the park, we returned to Fresno. While our hotels in Fresno were strategically planned with the rest of our itinerary and flight times, our hotel in Fresno was half the cost of our hotel in Mariposa.
Entrance Fees for Yosemite National Park
Entrance to Yosemite National Park is $35 for a 7 day pass. Annual passes, such as the America the Beautiful Pass, are also accepted.
Reservations for Yosemite National Park
Most visitors will need a reservation to visit Yosemite National Park. This is a new measure that was introduced to try to control crowds at the park. So when you have your plans and dates set, pick up a reservation.
If you’re traveling from late spring to early fall, you’ll want to check if a reservation is required.. During the summer, reservations are required everyday. In late spring and early fall, reservations are only required for Saturdays, Sundays, and holidays (such as Labor Day, Memorial Day, etc.). These reservations are required for entry between 6:00 am and 2:00 pm. If you plan to enter the park outside of these hours, you do not need a reservation (although you will not be allowed to re-enter the park between 6:00 am and 2:00 pm without a reservation).
Reservations cost $2 and are valid for three days. So if you purchase a reservation for Wednesday, you can use that same reservation for Wednesday, Thursday, and Friday.
Reservations can be purchased through recreation.gov.
If you do not have a reservation, you’ll be turned around at the entrance.
A limited number of the reservations are held until the night before, so if you didn’t manage to get a reservation weeks or months in advance, try the night before. If you still don’t have a reservation, you’ll need to get up very early and enter the park before 6:00 am.
Learn more about reservations across US National Parks.
Managing the Crowds at Yosemite National Park
The crowds at Yosemite National Park can be crazy and because of that, I recommend getting an early start. We arrived at our trailheads by 8:00 on both days of our visit. We shared the trails with other hikers, but we noticed a lot more hikers as we worked our way back from the various viewpoints.
More importantly, the entrances to the park can be a huge bottleneck. It gets so bad that there are signs posted along the road to tell visitors how long of a wait it will be (30 minutes from this point, 60 minutes from this point, etc.). Additionally, the traffic can get backed up through Yosemite Valley. Thankfully, we never experienced this but we always arrived in the valley early in the morning.
On our second day, we planned to stop at Mariposa Grove, but the lot was full so we exited the park (as that was our last stop before heading back to Fresno). It was 1:00 pm on a Monday in September that had rain (and snow in some areas) predicted for the afternoon. The line of cars to enter the park at the Mariposa Grove entrance stretched beyond the “60 minutes from this point” marker.
The point of all of this is to remind you to make your reservations and arrive at the park early. However, if you enjoy waiting in long lines, by all means, take your time.
Tips for Dealing with the Weather
Weather can be difficult and don’t be surprised by big temperature swings. These parks are big and if you put “Yosemite National Park” into your phone’s weather app, its forecast may be different than your actual destination in Yosemite. So, what I recommend doing is using the forecasts provided by the NPS.
For each park, you can select where you’ll be and they’ll give a forecast for that area. This is incredibly helpful as there can be some significant temperature differences throughout the park.
Final Thoughts
For first time visitors, I recommend giving yourself at least two days at Yosemite National Park. This park is huge and there is so much to do. Even with two full days you won’t see it all. But, this itinerary will give you the highlights and leave you inspired to start planning your next visit.
Continue Your Adventure
Yosemite National Park: Learn all about the top things to do at Yosemite National Park. Hike to Columbia Rock (or even all the way to Yosemite Falls). For non-hikers, I’ve put together a guide all about enjoying Yosemite without hiking. For those with limited time, check out my one day Yosemite itinerary.
More in California: Yosemite National Park is just one national park in California. Walk among the largest trees in the world at Sequoia, drive through the scenic Kings Canyon, visit the lowest point in the United States at Death Valley, and explore the rocks and trees at Joshua Tree.
Itinerary: Loop Yosemite, Sequoia, and Kings Canyon National Parks together in a one week road trip.
US National Parks: Start planning your national park vacation with my US National Park Travel Guide. You’ll find information about each park, photos, itineraries, budget tips, advice for non-hikers, the best scenic drives, and more. Plus, don’t forget to book your timed entry reservations in advance!