
Arches National Park is full of some of the most iconic rock formations in the entire state. You can hike to Delicate Arch (the arch that’s featured on Utah license plates), marvel at Double Arch, and so much more. With just one day in Arches National Park, you’ll have to be a bit selective of which arches you visit, but you’ll still be able to put together a truly epic itinerary.
One Day at Arches National Park
This itinerary has an early start. There’s two big reasons for this. First, it’s based on my own itinerary for Arches National Park which started early (since I’m a naturally early riser). Second, starting earlier helps to beat the crowds. Yes there is a reservation system in place to help ease the crowds at the park (more on this later), but I still think it’s a good idea to get an early start.
7:30 – Arrive at Arches National Park
Plan to arrive at the entrance to Arches National Park around 7:30 am. Hopefully there’s not a long line to get in, but you may have to wait. During my visit, before the reservation system was put in place, it took us nearly ten minutes to get through the line and into the park (though compared to lines I saw at Yosemite National Park, this is nothing!).
The good news is that the entrance to Arches National Park is just a short, ten minute drive from Moab. So while you’ll have an early morning, you won’t have to do a lot of driving to get here.
Once you enter the park, set your sights on Delicate Arch. This is a popular hike and parking can be terrible so we’re going to start here. Don’t worry about stopping at any viewpoints, we’ll have plenty of time for that later. From the entrance station, it’s a 25 minute drive up the mountain to the trailhead for Delicate Arch. Note that you’ll be looking for the Wolfe Ranch Parking Lot.
8:00 – Delicate Arch
The first trail of the day is for Delicate Arch, which I’d argue is the most famous arch in the entire park. While it’s true that there were other arches that I liked better, this is still very cool and well worth a visit. It’s difficult to see Delicate Arch from the road, so you’ll have to do some hiking to get here. There’s the trail to the arch as well as two other viewpoints. Right now we’re going to focus on the trail, but we’ll tackle the viewpoints later.
From the parking lot it’s 1.5 mile hike to the viewing area and during that time, you’ll gain about 600 feet of elevation. I wouldn’t call the trail difficult, but I can fully admit that I found it a bit harder than I would now. I’ve gotten a lot stronger, lost a bunch of weight, and became a better hiker. I guess my point is, depending on your hiking ability, this may not be the easiest trail, but I think most people with average hiking ability will be able to do this trail. As a note, this is the hardest trail of the day, so after this point, everything else is pretty easy.
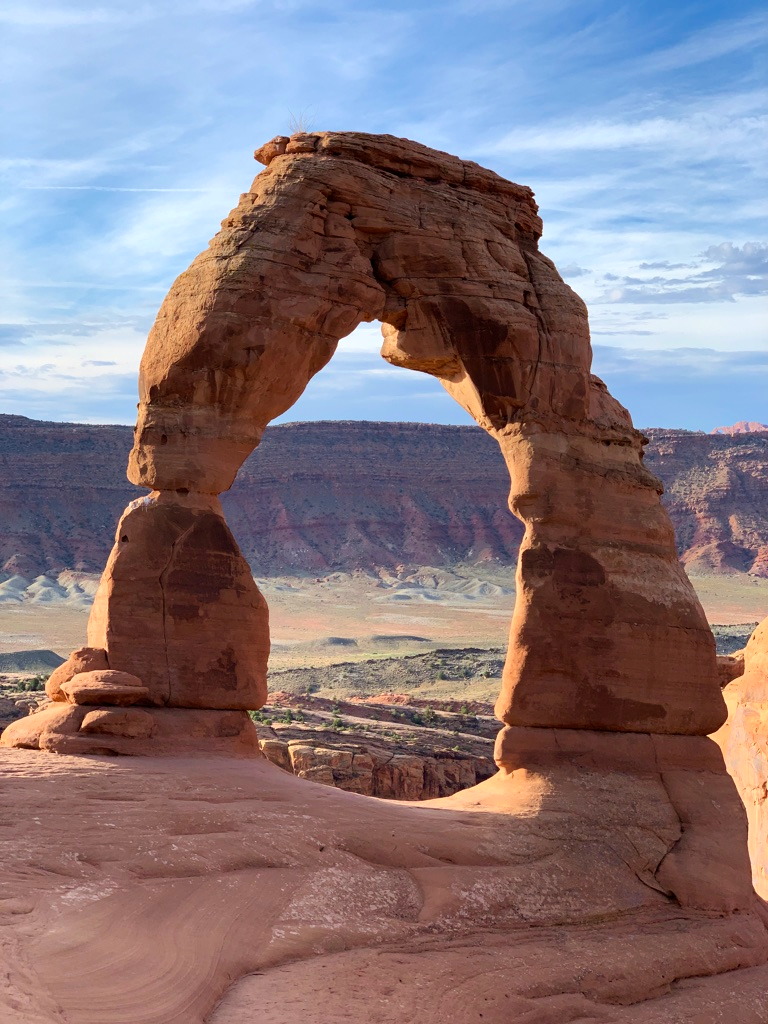
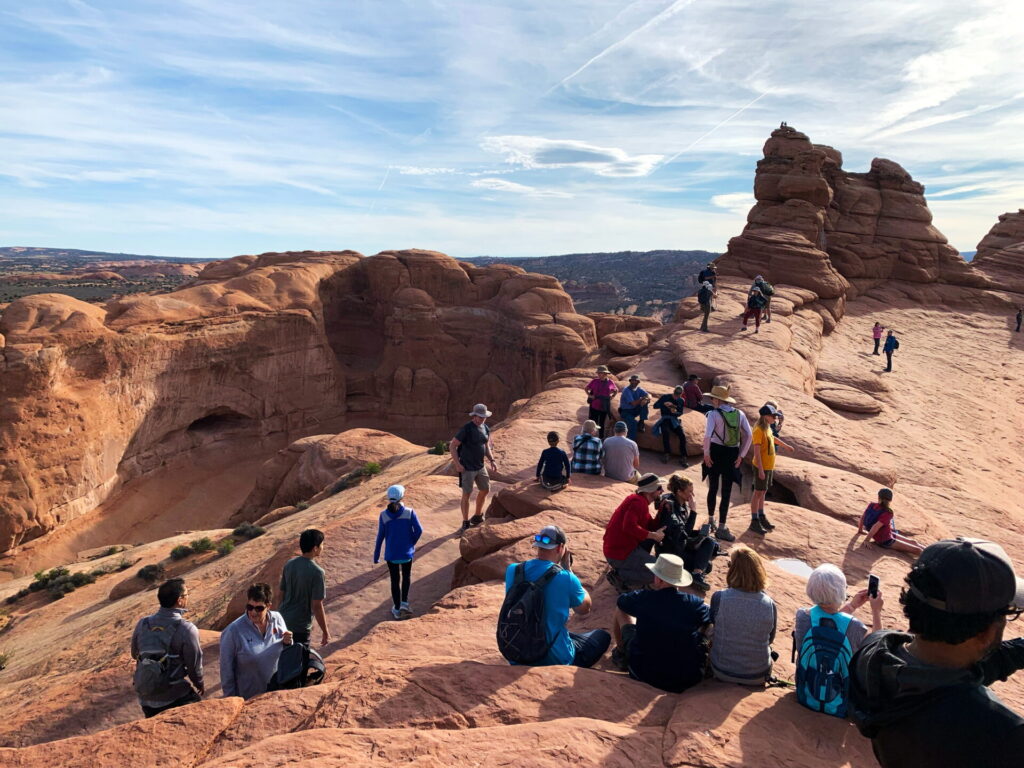
Once at the top, don’t be surprised if there’s a long line to get your picture inside Delicate Arch. This shouldn’t be a surprise because this trail is very popular and you’ll have likely passed loads of people on the trail already. Now everyone is here and wants the same view. Whether you wait for a photo is up to you, but just note, waiting in line is not pleasant.
Near the top, the ground is steeply angled downward and standing on it for too long can start to strain your ankles (or at least, it strained mine). But even if you don’t wait in line, take a break, find a spot to sit, and enjoy the view of Delicate Arch. It’s the best view of the arch you’ll get today.
When you’re ready, retrace your steps down the trail back to the parking lot.
10:15 – Skyline Arch
Next, drive to Skyline Arch. From the Wolfe Ranch Parking lot, it’s a short ten minute drive to Skyline Arch. Along the way, feel free to stop at a viewpoint or two. The Fiery Furnace Viewpoint is supposed to be great but the lot was full during my visit so I didn’t get a chance to see it. That said, the nearby Salt Valley Overlook is also spectacular.
The trail to Skyline Arch is short, coming in at just under a half mile. But you’ll get a view of another, very different arch.

10:45 – Sand Dune Arch and Broken Arch
After Skyline Arch, we’ll start working our way back to the entrance of Arches National Park. We’re just about at the end of the road and the only thing beyond is the trailhead for Devil’s Garden. We’re not tackling this area of the park on this itinerary, but fit and ambitious hikers may want to consider adding in part of the trail. For this one day itinerary though, we’re skipping it and will be heading south to Sand Dune Arch. This drive is incredibly short, but the only other way to access this arch is via Devil’s Campground.
From the parking lot, it’s a short walk to Sand Dune Arch. Unsurprisingly, this arch is found in the sand dunes, so you’ll need to be prepared to walk on sand to reach the arch. It’s not my favorite arch of the day, but we’re here for two arches, so it just makes sense to stop by.
After Sand Dune Arch, retrace your steps to the fork in the trail and follow it until you reach Broken Arch. This arch gets its name because of the crack at the top of the arch giving it the appearance of being broken. This trail is a bit longer, coming it at 1.3 miles round trip, but it’s still a pretty easy trail.
When you’re finished, return to your car and continue heading south as you work your way back to the entrance. You’ll continue to pass viewpoints like Panorama Point, so don’t be afraid to stop at check out the view. We’re not in a rush.
1:00 – Delicate Arch Viewpoints
Now that we’re working our way out of the park, let’s stop and admire Delicate Arch again. Rather than hiking all the way back up to the main viewpoint, stop and walk along the paths to the viewpoints. From the parking lot to the lower viewpoint, it’s about 100 yards. To the upper viewpoint, it’s about a half mile walk. I only did the lower viewpoint, but the upper viewpoint should provide a better, less obstructed view.
You may be wondering that if you’ve already hiked to Delicate Arch, do you really need to stop at these viewpoints? Technically, no, but I recommend stopping anyway. Why? To me, the big reason to stop is that it puts your morning hike into perspective. It’s cool seeing how far you climbed and where exactly Delicate Arch is in relation to the rest of the scenery.
A visit here can be quick, especially if you only visit the Lower Viewpoint, but I think it’s still a worthwhile stop.
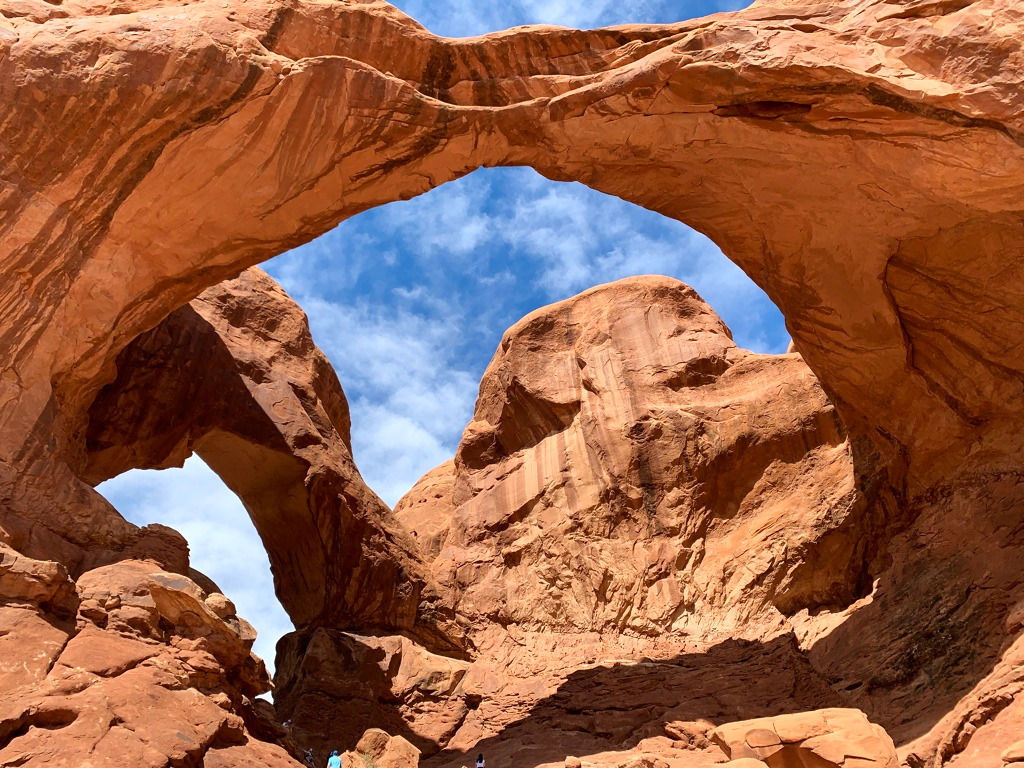
1:30 – Double Arch
Next it’s a short drive to Double Arch which is one of my favorite arches at Arches National Park. What makes this arch so cool is that there are two arches sharing the same struct, leading to a double arch.
The hike out is only about 0.5 miles it’s not bad at all. The trail is flat and packed with gravel, so most visitors will be able to handle it. In fact, if you don’t want, you can see Double Arch without walking the full trail. But I recommend getting up close. Yes Double Arch is cool from far away, but I think it’s even better up close.
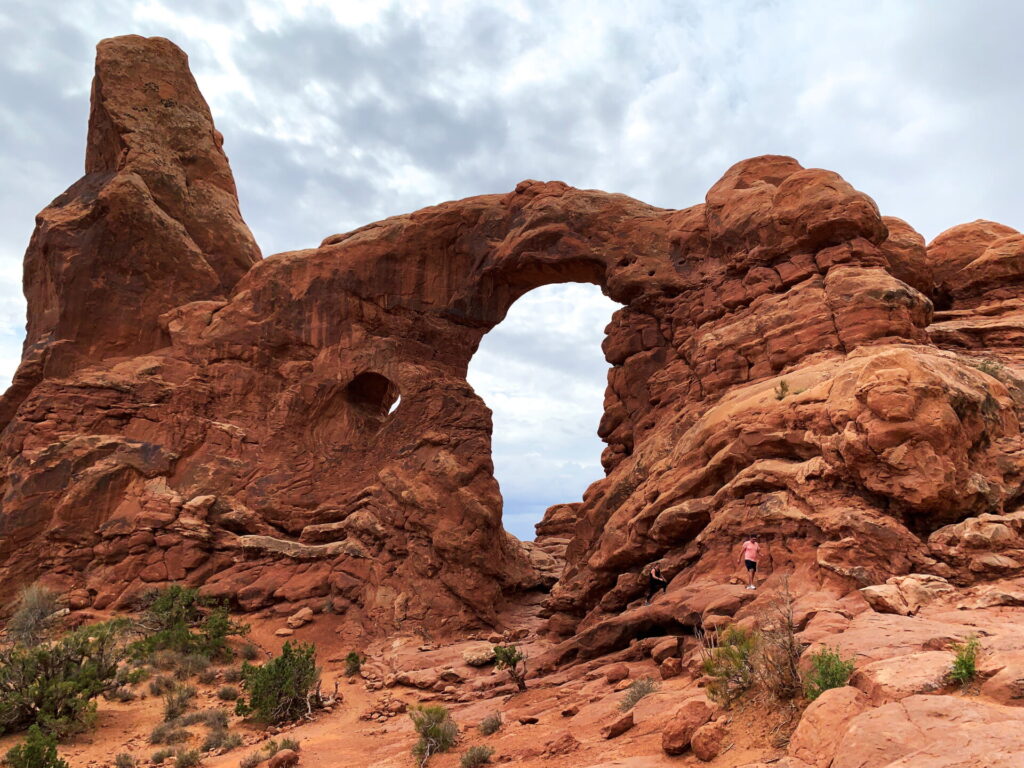
2:00 – The Windows Trail
After you’ve finished at Double Arch, you’re in good position to do The Windows Trail. While the lower level of the parking lot is closer to Double Arch, the upper level of the parking lot is closer to The Windows Trail. You can move your car, or just walk across the lot (which is what we did since the upper lot was full).
The Windows Trail is a one mile trail with about 100 feet of elevation change. On this trail you’ll hike pass the North and South Windows which are excellent views of the park. Plus, you’ll also pass Turret Arch. The National Park Service says “The Windows Section is considered by some to be the beating heart of Arches National Park”. I’m not quite sure if I would say that, but it was a nice hike.
3:00 – Leave Arches and head to Moab
By now, you’ve just about made your way back to the Visitor Center at the very front of the park. It’s time to head back your to Moab. Grab some lunch, take a shower, and enjoy your evening.
With More Time
While I think you can accomplish a lot in one day at Arches National Park, two days will allow you to go at a more relaxed pace. Or, you could do my one day itinerary on your first day and on your second day, hike the 7.8 mile loop at Devil’s Garden.
If I’m honest though, if you have two full days in Moab, I think your time would be better spent having one day at Arches National Park and one day at nearby Canyonlands National Park. This is what my mom and I did and I’m so happy we did. Despite both parks being within a 30 minute drive of each other, the scenery is completely different.
Plus, there’s also nearby Dead Horse Point State Park which is just one more option to explore from Moab.
Crowds at Arches National Park
In 2021, Arches National Park was the third most visited national park in Utah. Over 1.8 million visitors came to see the amazing landscapes. It was beat out by Zion National Park (at five million) and just narrowly by Bryce Canyon National Park (at 2.1 million).
Because of the amount of people visiting every day, it is important to have a plan so you are able to make the most of your time and see everything you want to see. When we visited in October 2021, my mom and I had a rough plan to start our day, but we deviated slightly as the day went on. These deviations were a result of both tiredness and the inability to find parking in some locations.
Service in the park is incredibly spotty, but if you manage to get a bar, you can check the current parking status at the major trailheads online at the NPS website.
Reservations at Arches National Park
In 2022, a new reservation system was rolled out, so in order to visit Arches National Park, you will need to make a timed reservation in advance. This is to help keep crowds in check, but should also make your parking situation a little bit easier. It’s important to note that this reservation does not include your entrance fee to get into the park. Even once you’ve made your reservation, you will still need to pay the $30 entry fee (or present your America the Beautiful Pass) to enter.
Getting Around Arches National Park
There is no shuttle is Arches National Park, so you will need your own vehicle. Since everyone is driving their own personal vehicle, it can become a race to try and get parking at your preferred lot. All of those cars need to be parked somewhere. At certain trailheads and overlooks, parking can be extremely difficult so be prepared to be flexible.
Don’t expect to have cell phone service in the park. You can download Google Maps for offline use, but also pick up a map when you come through the front entrance. Driving through the park is very straightforward, but you just need to keep your eyes peeled and make sure you know where you’re going so you don’t miss your turn.
Where to Stay
Moab is the closest town and makes a great base for exploring Arches National Park.
Final Thoughts
Arches National Park is famous for a reason. The rock formations are iconic and the park is easy to explore. With just one day, you’ll see a lot of highlights but also leave feeling satisfied. Of course you could spend more than one day at Arches National Park, but with so much other incredible nature in the area, I think it’s best to limit yourself to one day at Arches so the rest can be spent on something entirely different.
Continue Your Adventure
Utah: Tour Utah’s “Might Five”. Arches National Park is full of iconic rock formations, hike among the hoodoos at Bryce Canyon National Park, experience the vastness of Canyonlands National Park, see the red rocks and natural arches at Capitol Reef National Park, and take on some epic hikes at Zion National Park. And don’t forget to venture beyond the national parks to places like Snow Canyon State Park. Learn more in my Utah Travel Guide.
Itineraries: Do you want to explore Utah’s Mighty Five? Check out this 10 Day Itinerary highlighting Utah’s awesome national parks.
Nearby: Utah has a lot to offer for nature based travel, but so to nearby states. In Arizona, you’ll find the Grand Canyon and Monument Valley. To the east, you’ll find Colorado with its spectacular parks, including Mesa Verde.
US National Parks: Start planning your national park vacation with my US National Park Travel Guide. You’ll find information about each park, photos, itineraries, budget tips, advice for non-hikers, the best scenic drives, and more. Plus, don’t forget to book your timed entry reservations in advance!