
The Lost City Trek in Colombia is a bucket list activity for many hikers. Over the course of four days (though it can be done in 3 or 5 days), you’ll hike through the mountains of Colombia to reach the “Lost City” of the local indigenous people. It’s a tough trek, made tougher by the fact that you need to carry everything you need for those four days. This makes packing particularly important.
So, based on my own experience, I put together a Lost City Trek packing list that’s full of all of my recommendations for the trip.
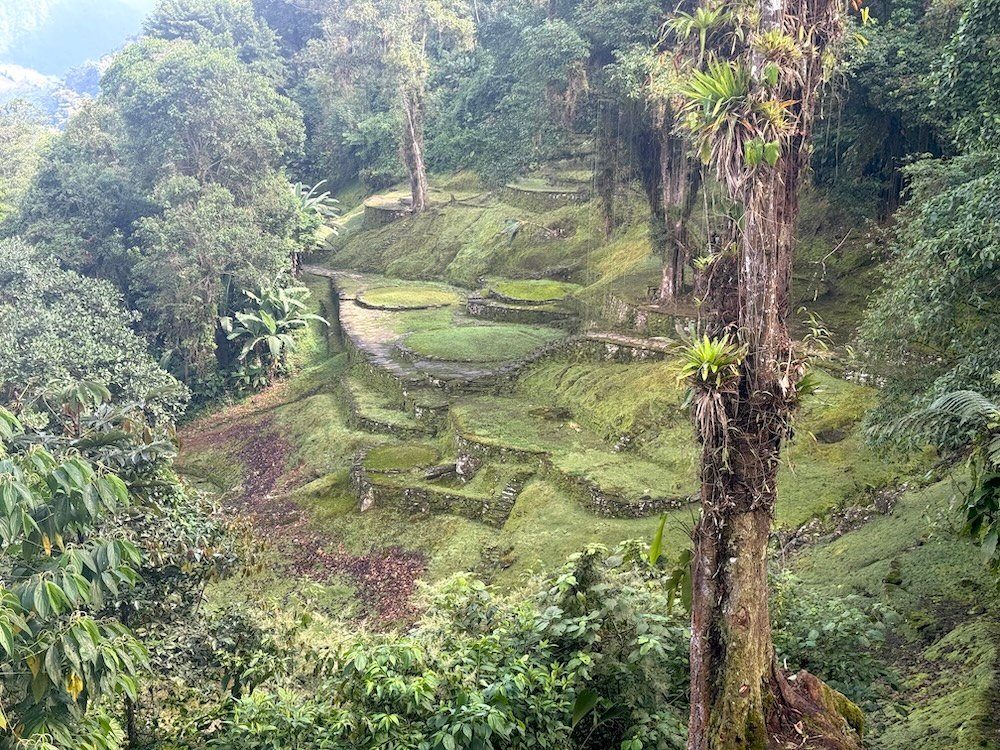
What is the Lost City Trek
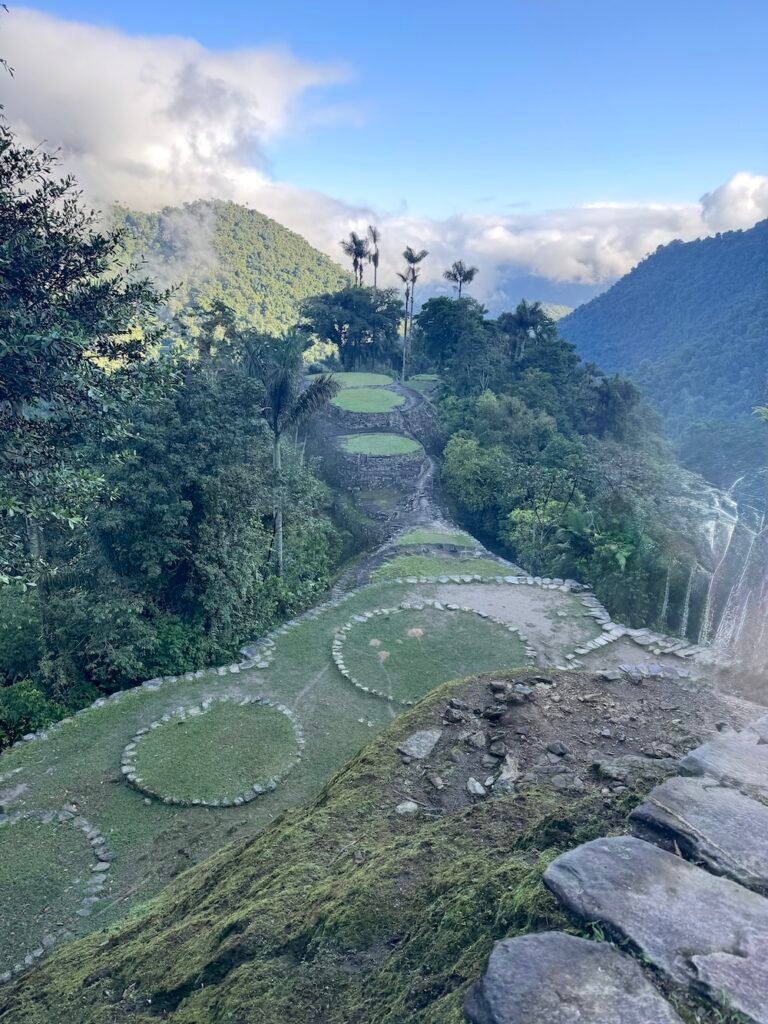
The Lost City is a bit of a misnomer. It was never truly lost because the local indigenous people always knew where it existed. It was until the late twentieth century that it was “rediscovered”. Now days, plenty of tourists make the 3, 4, or 5 day trek from the town of El Mamey to the Lost City. It’s tough trek covering over 30 miles with over 10,000 feet of elevation gain and descent across uneven terrain. Your reward for all of this hard work is the chance to city this spiritual place.
Note that the Lost City Trek must be done in a guided tour. One guy on my tour strongly prefers independent travel and tried his hardest to find an independent way to visit the Lost City. Obviously since he was on our trek, he finally gave up and just paid for the tour.
General Tips for Packing
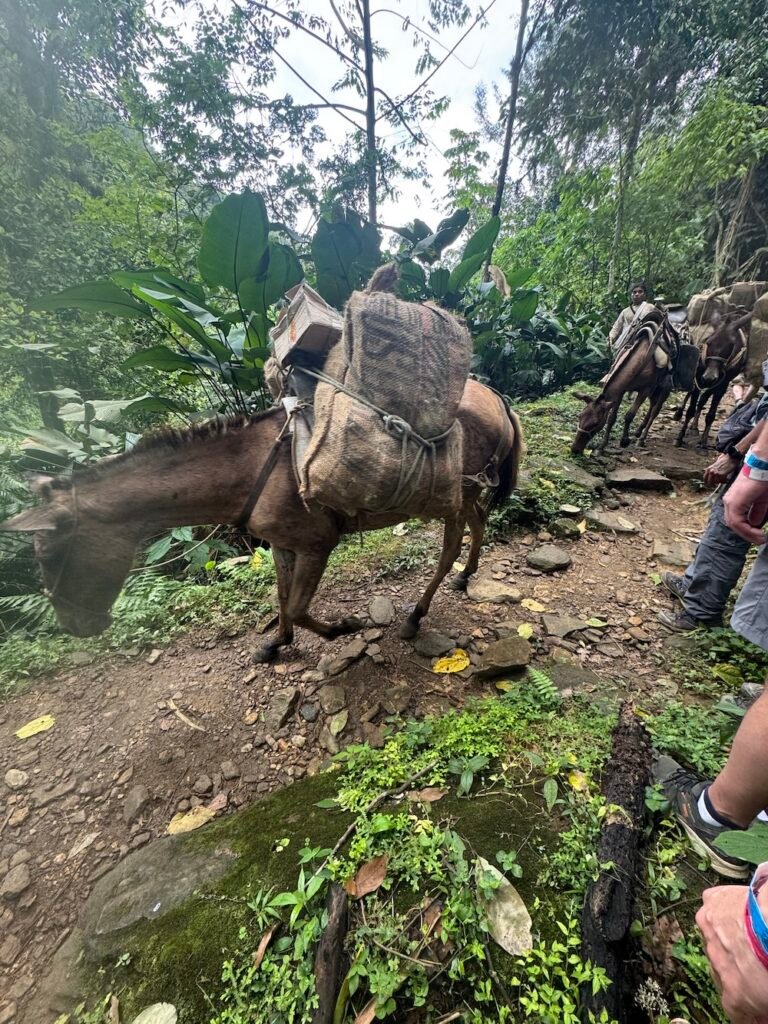
Unlike some other popular multi-day treks (like Peru’s Inca Trail), you have to carry all of your own gear. You’ll carry your clothes, water, toiletries, and anything else you may need for the trek. While there are occasions where you can pay for a moto taxi to take your bag (or you) back down, it’s customary to pack light and just carry your own things since there are numerous points where that’s your only option.
So, my advice is to be selective of what you’re packing. Make your bag as light as possible for the trek through the mountains. The trek is hard enough without lugging extra weight.
Many tour companies will allow you to store your bags at their office for the duration of the trek. They know you need to be as light as possible. In my case, I stayed at a hostel that allowed me to leave my bag in their storage room for my trek. The benefit was that I didn’t have to lug my big backpack across town, just to bring it back to the same hostel at the end of the trek (since I stayed in Santa Marta on both ends of my trek).
That said, your tour company may be willing to drop you at a different location than where you started. One woman was picked up in Santa Marta, but was dropped off near Minca. Another couple was picked up near Tayrona National Park and dropped off in Santa Marta. In this instance, obviously store your bag with your tour company.
Lost City Trek Packing List
Everyone will have slightly different opinions of what is necessary on the Lost City Trek and there are plenty of other packing lists online. I think it’s a good idea to read a few lists to see what everyone deems important.
Backpack
Obviously you’ll need something to carry all of your gear. Since you want to pack light, I recommend a lightweight backpack. I carried a 20 liter backpack, but I think it would have been just slightly easier for packing with a slightly larger backpack. I think something around 25 liters would be a good size. This gives you enough space to bring everything you need without so much extra room that you will overpack.
Note that your backpack will get incredibly dirty and smelly along the way. If you have an older hiking backpack that you are considering get rid of, use that backpack and then get rid of it after the trek. Trust me when I say that everything on the trek ends up sweaty and smelly and dirty. Everything.
Along with your backpack, I recommend bringing a waterproof rain cover. Nothing ever dries on the Lost City Trek, so you want to make sure to keep your things as dry as possible. I had to use my waterproof rain cover on the first day of our trek when it started raining (we made it into camp about five minutes before the heavens opened and there was a torrential downpour) and was very grateful I had it. Other group members were trying to fasten their rain jackets into a makeshift cover and I’m honestly not sure how well that went.
Thankfully, we only got heavy rain that first day and then there was a light rain on the evening of the second day after we finished hiking. Two days after I finished (when I’m writing the first draft of this post), it poured all day. Do what you can to protect your things.
Dry Bag
Continuing on with waterproofing, I recommend keeping all of your things in a dry bag in your backpack. Yes, even if you have a waterproof backpack cover, it’s good to have redundancy when it comes to waterproofing. I cannot stress enough how you want to make sure that you have dry (or at least mostly dry) clothes at the end of a day of hiking. And dry socks are essential. One woman I talked to told me she knew of someone who got trench foot on the Lost City Trek because they only had one pair of socks that never dried during the four days.
The dry bag is technically optional, but it gave me great peace of mind while trekking. I knew that everything important was dry and I’d always have dry underwear and socks at the end of the day. Plus, my battery bank and chargers stayed dry as well which is super important.
One last benefit for the dry bag/second bag. When we visited the Lost City on day 3, we were able to leave most of our things behind. This meant that we only had to carry water and absolute essentials (like bug spray) to the Lost City, which made hiking so much easier. Having one bag to leave behind (while several others had two or three) was very nice.
Water
You need to stay hydrated on the Lost City Trek and it’s up to you how exactly you do it. There is filtered water provided for free at each camp, but I’ve read plenty of stories about people getting sick from this water. I drank this filtered water, but I treated it with my Steri-Pen before drinking. I never got sick. Another woman on my tour used a LifeStraw water bottle to add one more level of treatment to the water.
If you don’t want to take your chances with the filtered water and don’t want to carry a purification device or filter, your other option is to buy water along the trail. Each camp sells bottles of water, but the price increases the further into the trek you get (as the bottled water all has to be brought in by mule). Additionally, there are small stores along the way, typically one hour to one and a half hours apart that sell water.
At the lower stops, budget about 7,000 COP per liter. At camp 2, I bought a bottle because I was too tired and couldn’t be bothered to purify it (plus it meant I was able to get a cold bottle of water) and I paid 10,000 COP. I talked to a woman who did the trek a week before me who said at one point she paid 20,000 COP for a bottle of water.
It’s up to you whether you want to use the filtered water, purify the filtered water, or just stick to bottled water. Regardless of which you choose, I recommend bringing a reusable bottle that you can fill up each time you stop (even if it is with the bottled water).
Clothing
Keep your clothing minimal. It takes up room in your bag and adds weight. Yes, you’ll be trekking for four days, but in my opinion, you need less clothes than you think.
Underwear – Bring enough so you have one clean pair for each day of the trip. So, if you do the popular four day trek, you’ll need to pack three pairs.
Socks – Bring one pair for each day of the trip. Even if you have good hiking socks that you can wear more than one day, I recommend having one pair for each day, just so you can guarantee you have a dry pair each morning. I had four pairs of socks total (the socks I was wearing on day 1 and then three more in my bag).
I ended up using three pairs since I was able to get one pair to dry completely over the course of the trek. Since I had wet shoes on the start of day 3 (since I had to wash them the night before), it was nice knowing that I had the option of changing into dry socks if I needed to.
Bras – If you’re a bra wearer, I recommend two sports bras. Inevitably, you’ll have to put on a damp bra at some point, but you’ll get over it pretty easily. Wear one and pack the other.
Camp Clothes – This is what you’ll wear at night once you’re done trekking and you’ve showered. I recommend long pants and long sleeves as the mosquitos are nasty at night. I brought leggings, but I wish I had brought a lose pair of joggers. You don’t want them too loose though as some of the people with looser pants complained about mosquitos flying up the opening near their ankles. These camp clothes will double as your pajamas.
Hiking Clothes – I recommend two hiking outfits that you can cycle between. I wore shorts while hiking, so I wore one pair and packed the other. For tops, I wore a sun hoodie three of the four days and swapped to a t-shirt for one day (because my sun hoodie was way too wet to wear on that extra day). The sun hoodie was great in that it protected my arms from the sun and mosquitos without having to use sunscreen or bug spray.
Note that with two outfits, you will be rewearing the same clothes. It can be uncomfortable putting on damp, sweaty, dirty clothes but you get used to it very quickly. And twenty minutes into hiking, everything with be damp with sweat again so you won’t even notice.
Swimwear – One of the highlights for many is the afternoons swimming in the river once you get to camp. My group was usually too late to camp to get a lot of swimming opportunities, but I still recommend bringing a swim suit.
Towel
Along with swimwear, you need to bring a towel. Even if you don’t plan to swim, you’ll need a towel in camp to dry off from the showers. Even though it’s a cold shower, it’s incredibly refreshing after a long day of hiking and you’ll need some way to dry off. Try to bring a microfiber or quick drying towel. It may not dry completely, but you want to get it as much of a chance as possible to dry.
Shoes
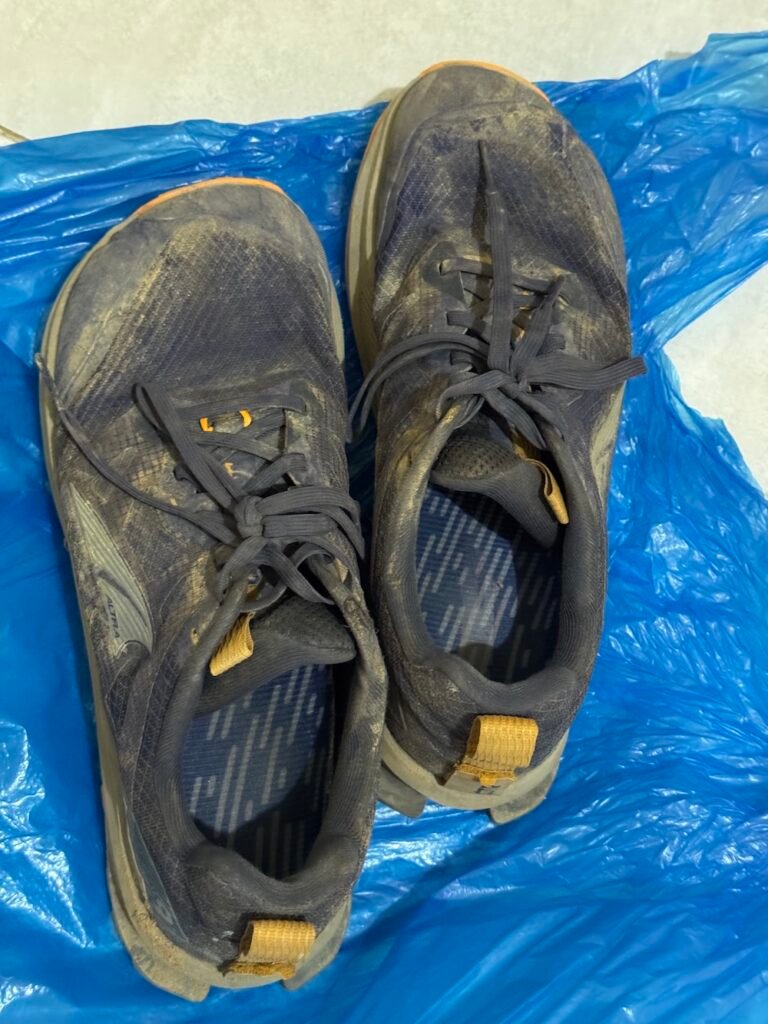
You need two pairs of shoes for the Lost City Trek. The first pair is the obvious pair. It’s the shoes that you’ll be hiking in during the day. Get a good pair of hiking shoes or hiking boots that have a really good tread. You’ll need it. Also note that your shoes will be filthy by the end of the trek.
I got stuck in some mud on day 2, so I took my shoes down to the river and cleaned them as best as I could. Two days later when we finished the trek, my shoes looked just like everyone else’s (and they didn’t get stuck in the mud). They were dusty, dirty, and I don’t think they’ll ever be the same. So if you’re bringing new-ish hiking shoes, they will be pretty gross by the time you’re done.
The second pair of shoes you need is something for at camp. You could go barefoot or wear your hiking shoes, but I highly recommend just bringing a lightweight pair of sandals. They don’t take up much space and will give your feet a little bit of protection as you move about camp.
At Camp 2 (on our third night), our sleeping area was a bit of a walk between the store/kitchen/dining area and the bathrooms, so I was grateful for a pair of shoes. And after hiking all day, nothing feels better than taking your shoes off and switching to sandals. In fact, when we stopped for our longer breaks at lunch, many of us switched to camp shoes to let our feet breathe. It was so nice.
Toiletries
While your general level of cleanliness goes down over the course of four days on the Lost City Trek, you still need to bring some toiletries with you.
Toothbrush/Toothpaste – This is pretty self explanatory
Soap – While I skipped the deodorant (and I have no regrets, all of my clothes were wet and sweaty within 20 minutes of hiking), I do recommend soap to help rinse off at the end of the day.
Sunscreen – Parts of the trail are covered by trees, but there are plenty of other parts of the trail that are completely exposed. Bring sunscreen and bring plenty of it. You’ll need to reapply during the day because you’ll sweat through so much of it.
Bug Spray – I cannot stress how important bug spray is on the Lost City Trek. Thankfully, I only got a few bites, but I was excessive with my bug spray usage. I bought some heavy duty bug spray in the US (since I needed it in one of my first stops of the trip) and it came in so handy. I sprayed myself in the morning and reapplied two or three times per day (plus two or three times at night because the mosquitoes loved our exposed feet and ankles at night). This is one item that you don’t want to skimp on.
Anti-Itch Cream – You’re going to get bitten at some point. If you’re like me and mosquito bites itch like crazy, bring some anti-itch cream. You can also easily make friends if you offer it to another person.
Toilet Paper – Some of the camps had toilet paper, but they often ran out. I recommend bringing your own and remembering to bring it with you when you go to the toilet or you’re in for a fun adventure.
Medications & First Aid
If you are taking any medications, make sure to bring them with you. It’s also a good idea to bring a small stash of medication along with you since your guides cannot give you medication. I brought a few painkillers and some stomach relief (I used the pain killers, but the stomach relief thankfully never had to be brought out).
For first aid, go minimal. I brought a few bandaids and some Neosporin (as I’m naturally clumsy and I did fall a few times on the trail). Blister patches are also a great idea since you’ll be doing a lot of walking over these four days.
Colombian Pesos
Technically, it’s possible to go through the entire Lost City Trek without spending any extra money. Your trekking fee includes your food and filtered water. But I still recommend bringing cash with you. If you plan to purchase water, gatorade, beer, or anything else along the trail, you’ll need to have cash, so make sure you pick up enough before you leave Santa Marta.
I bought a bottle of gatorade each day and spent about 10,000 pesos per day. Everyone else in my group had at least one beer each night and in general, I’d budget at least 10,000 pesos per beer. It may be more at the higher camps, but it was less at the lower camps.
If you want to tip your guides, make sure to bring cash with you for that as well. Plus, I made a donation to the local tribe and got a bracelet in return.
How much you bring is up to you, but I’d suggest bringing at least 100,000 for purchases along the way (more if you’re planning on exclusively using bottled water). One woman I talked to said she spent 120,000, so it’s probably best to bring more, but that’s where I would start. Plus, you may want to bring money for a tip for the guides and the chef. Tipping is completely optional, so it’s up to you how much you do.
Hiking Poles
Hiking poles are at your discretion. I brought my hiking poles from the United States and had been lugging them around Colombia for two weeks prior to the start of my trek. My first day, the proved themselves so useful as we descended a particularly slippery area of trail. They kept proving their worth day after day and I honestly am not sure if I would have made it without my hiking poles. I’m sure I probably could have, but it would have been very difficult.
One other woman on my trek used two poles occasionally. Then there were two other couples who split a pair of poles with each partner taking one pole. The other seven people did it without hiking poles and had no problems.
I think it really comes down to the person and what you’re comfortable with. Know your hiking ability. If you don’t have your own hiking poles, but think they could be useful, talk to your tour operator. My company, ExpoTur, had a few extra poles that they gave out in the beginning.
And worst case, you can find a stick in the jungle. I saw several people using random sticks as make shift hiking poles.
Chargers
While I recommend going very minimal on the electronics, it’s inevitable that you’ll want to bring your phone for pictures. Make sure to bring a charger for it.
If you have a smartwatch, I also recommend bringing a charger. One woman in my group had an AppleWatch and had to charge it every night. I have a Garmin watch and despite it having a long battery life and having a full charge when I started, I still had to charge it each night. Another guy had a Garmin watch and didn’t bring a charger, so I had to loan him mine.
Miscellaneous
Lastly is the miscellaneous section which just has a few things that I’d recommend bringing that don’t really fit into any of the other sections.
Sunglasses – Parts of the trail are covered in trees so sunglasses aren’t needed, but other parts are exposed and sunglasses are so nice to have.
Hat – This is for sun protection and it can really make a big difference. I didn’t have a hat and made it just fine, but I’m including it on this list anyway.
Something to wipe the sweat – Sweat is inevitable on the Lost City Trek. You will sweat a lot and I recommend having some way to wipe the sweat away from your forehead before it drips into your eyes and becomes uncomfortable (since it will be a mix of sweat, sunscreen, and bug spray). A buff or bandana will work, if you have one. I didn’t have either of those so I went to a store the day before my trek and picked up a microfiber dishcloth. It did the job and I’m so happy that I had it.
What Not to Bring on the Lost City Trek
Now that we’ve talked about what to bring on the Lost City Trek, here are the things that I recommend leaving behind.
Excess Toiletries
You can go more basic on the Lost City Trek. I brought a hairbrush, but never used it (my hair stayed in a ponytail the entire four days which made for an adventure when I showered in Santa Marta when I got back). Since I didn’t bring a brush, I also left shampoo and conditioner back in Santa Marta.
I skipped the deodorant and have no regrets on that. My skin care also became minimal and left most things back in Santa Marta. Strip out as much as you possibly can. It might take an adjustment that first day, but you’ll be thankful you are carrying less.
Electronics
Bring only the essential electronics. For most, that is a phone and a charger for your phone. I also brought my Steri-Pen for water purification, but that was optional.
I brought a backup battery, but this turned out to be unnecessary. We were able to charge our phones at camp. So my advice is to either bring a battery bank or a wall charger (and if I were to do this again, I’d stick to the wall charger and leave the battery bank in Santa Marta).
Basically, with all of the humidity and the dampness, your electronics are going to take a beating. Protect your things by leaving them in Santa Marta.
Valuables
This should go without saying but leave anything valuable in Santa Marta. Things get ruined on the Lost City Trek and the less you bring, the less that can get ruined. Essentially, don’t bring anything that you aren’t prepared to lose.
Snacks
I brought snacks on the trail and I didn’t necessarily need to. We were fed so well that my snacks weren’t needed. Was I glad I had them at certain points? Yes. Nerds Gummy Clusters were a hit with my group and they provided me a bit of a sugar rush before some difficult sections. But in general, leave any food and snacks behind.
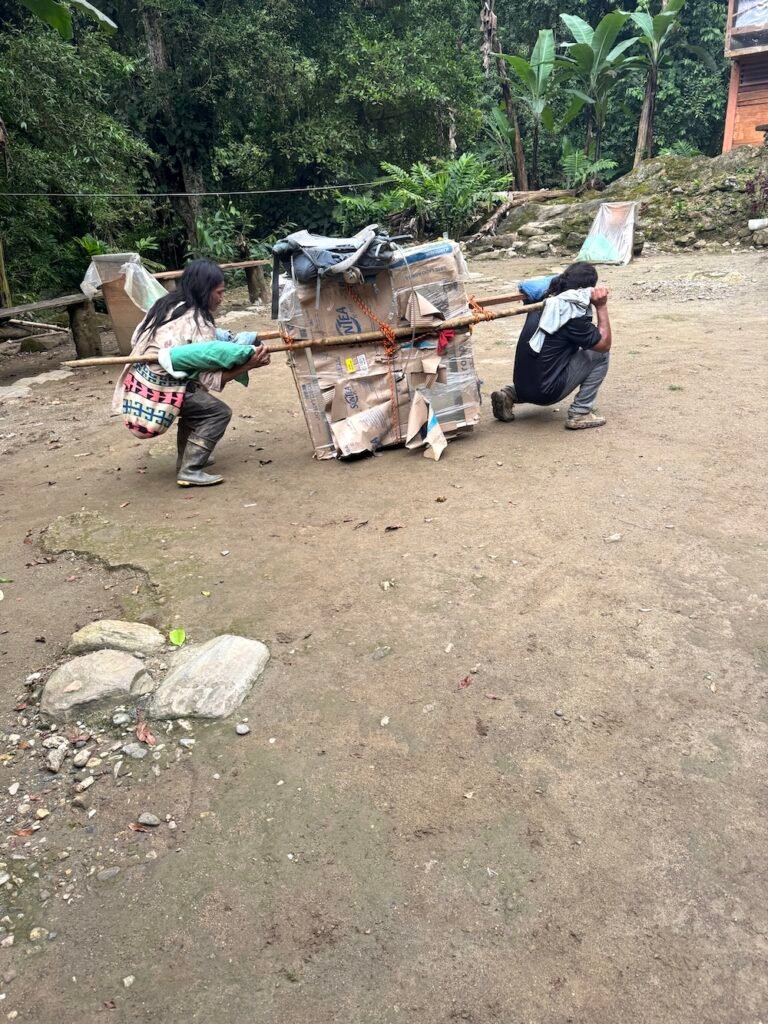
Anything Too Heavy
You have to carry all of your own gear. Pack light and leave all of the heavy things behind. My guides literally carried a museum display case all the way up to camp 3. They’ve done this trek hundreds of times and they were completely exhausted by the time they reached camp 3.
Final Thoughts
There you have it. That’s my Lost City Trek packing list, full of everything that I recommend you bring (and leave behind). It may seem like a lot (or not enough), but this is what I brought and what I would encourage everyone who’s doing the trek to bring.
Continue Your Adventure
Tayrona National Park: It’s more hiking, but before or after your trek, make the trip to Tayrona National Park for a fun beach day.
Colombia: Start planning your trip with my Colombia Travel Guide which includes a realistic travel budget, my top travel tips, safety information, a nine day itinerary, and so much more.