
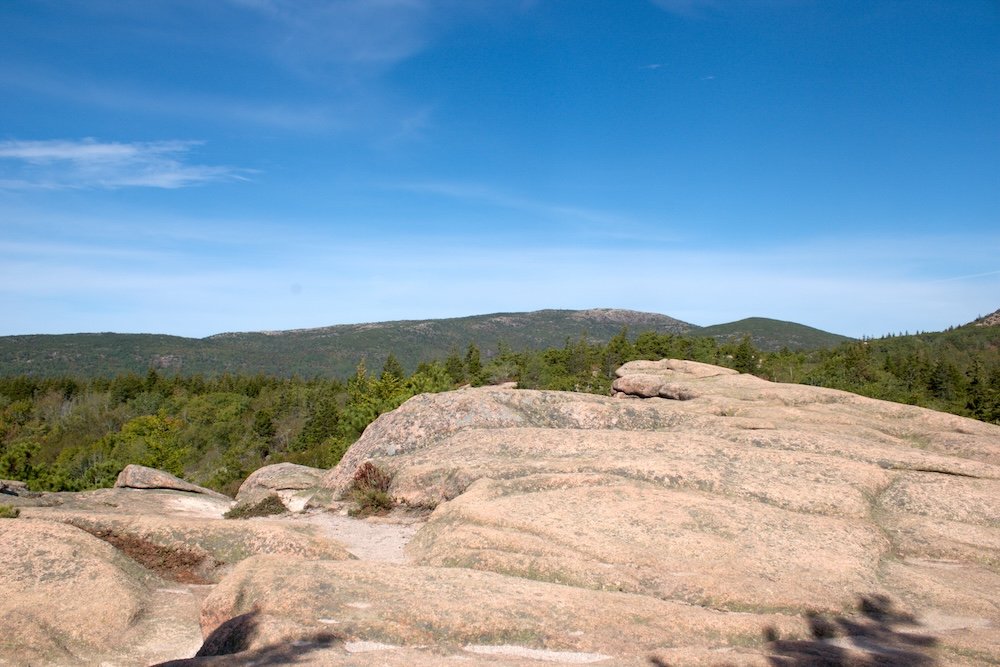
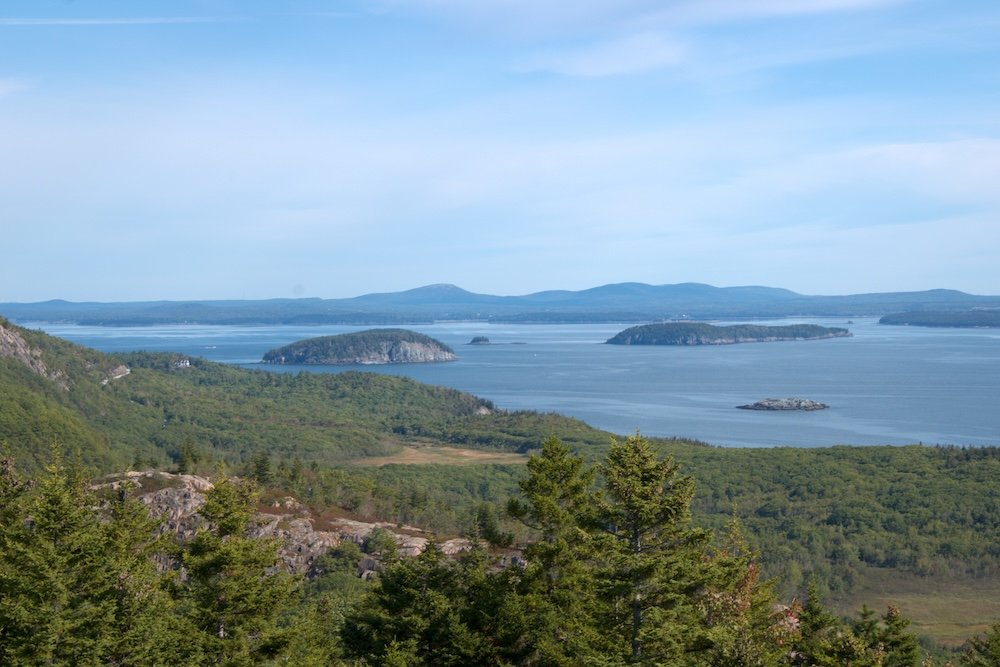
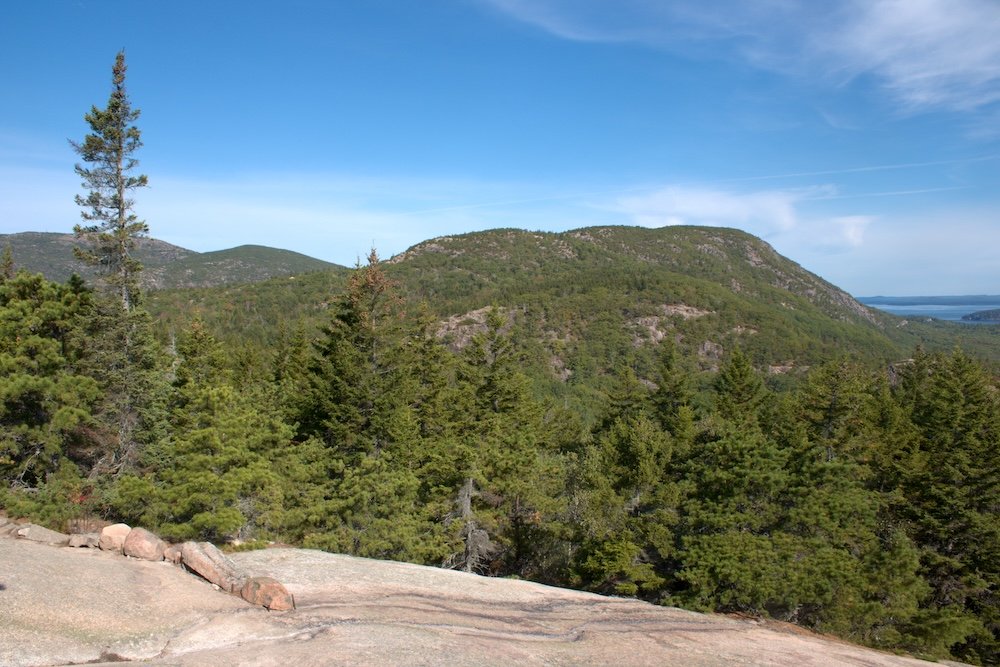
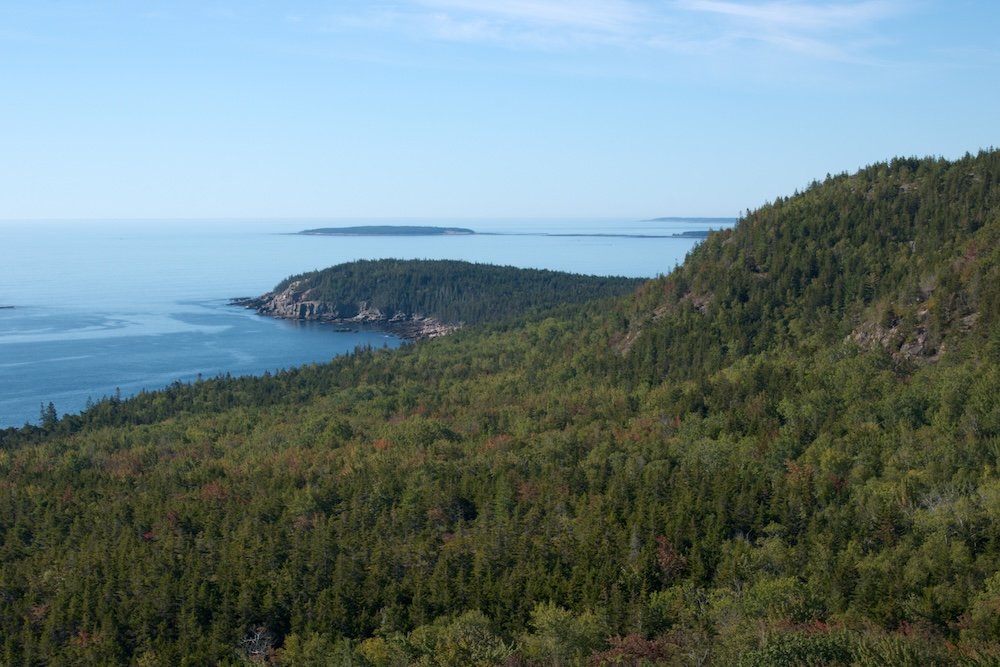
One of the most popular hikes at Acadia National Park is the Beehive Trail. It’s an adventurous trail that takes you along open cliff edges and up metal rungs and ladders that are drilled into the mountain rocks. Your reward for hiking this trail is trail is a sweeping view of the surrounding area. You’ll see other mountain tops, covered forests, a sandy beach, and the ocean.
The views themselves sound great but there’s a lot more to this trail than just the views. The Beehive Trail is a difficult trail and its not a place to face your fears, so in this guide, I’m covering everything you need to know about the Beehive Trail so you can determine if hiking it is right for you.
About the Beehive Trail
Let’s talk about the actual Beehive Trail itself. I’ll give an overview of what to expect as well as some tips for your hike before answering some common questions.
Trail Stats
On my hike, I logged 1.6 miles and 512 feet of elevation gain. It took me one hour and 27 minutes to complete. That includes some time at the top of the mountain, though I didn’t stay too long. The views are great, but I wasn’t a huge fan of the impromptu ukulele concert that was taking place up top.
Note that this time not just includes my stop at the top but also time spent waiting for other hikers to traverse ladders and rock paths. The trail is popular and gets busy (I’ll talk more about managing crowds later), so you often find yourself waiting for other hikers to finish sections before you can continue on.
So based on my tracker, it took me 1 hour and 8 minutes of actual hiking time and 1 hour and 27 minutes of total time. I’m a bit skeptical on this because while I know I hiked slower than my normal pace, I feel like it didn’t account for all of the time spent waiting on other hikers. Still I’d recommend giving yourself at least two hours to do this hike. Maybe you’ll finish faster, but since you’ll almost certainly have to wait for other hikers, it’s best to give yourself more time than you think you’ll need.
Beehive Trail Overview
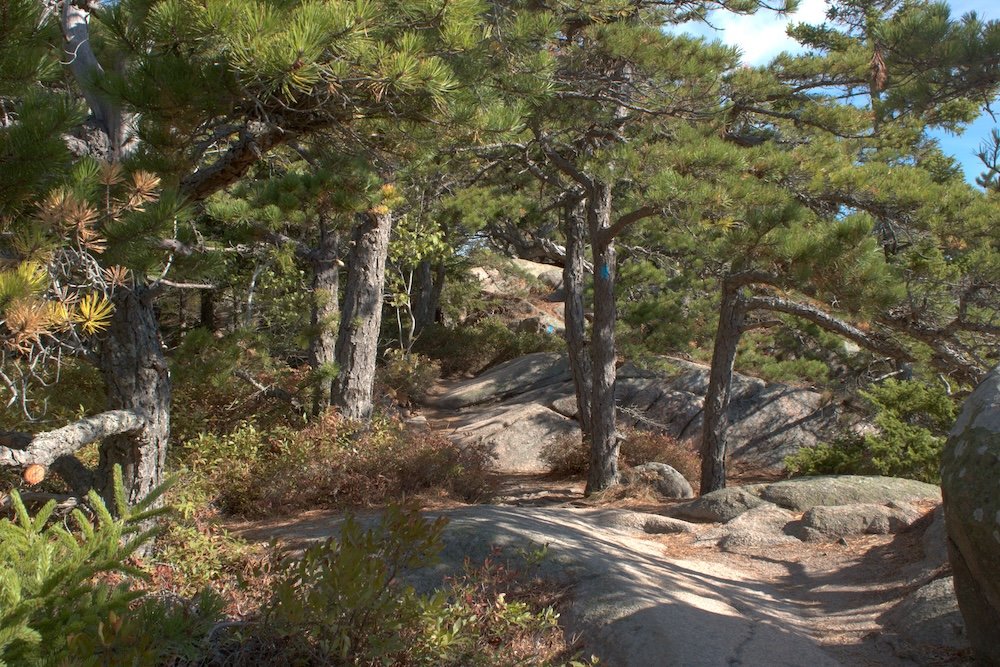
From the trailhead, you’ll have a very short walk before you immediately start climbing. The first half mile is the climb all the way to the top of the Beehive and it does not stop.
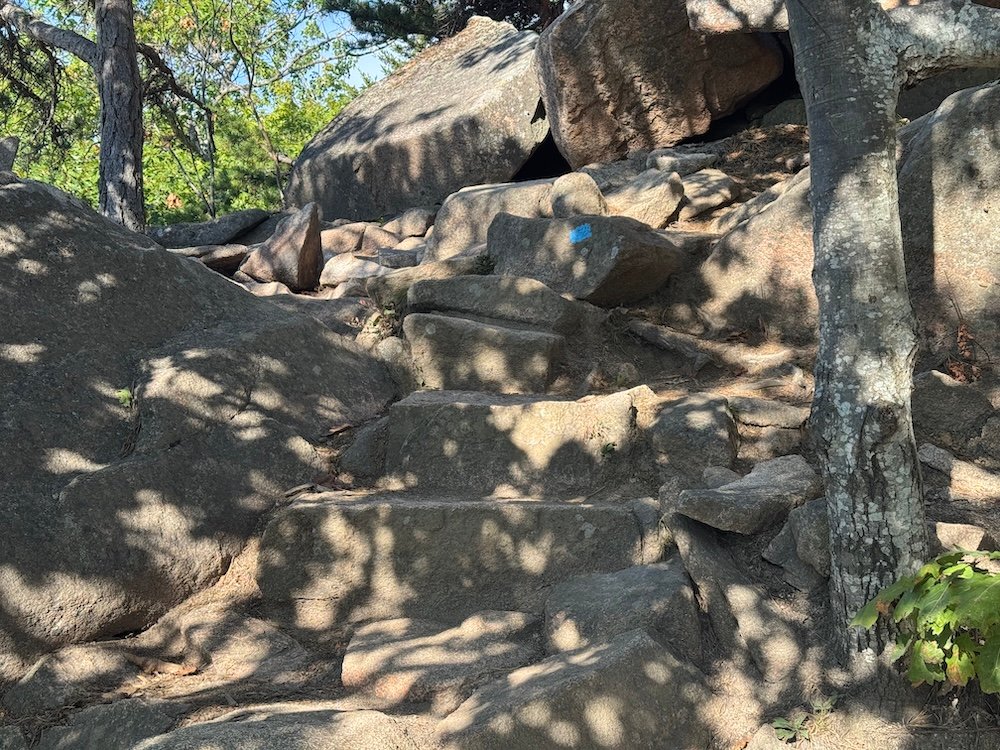
The first 0.2 miles is a standard trail with two directional traffic. The ground gets uneven and at one point it’s just a boulder field that becomes a choose your own adventure as everyone just seems to take the past that they thing is best to get to the end of the field.
After that first 0.2 miles, you’ll hit a fork in the trail. The Beehive Trail heads to the right with an informational warning you about what you’re getting into. To the left is the Bowl Trail which will take you to the Beehive Overlook but without all of the metal rungs and ladders. It’s the way that hikers will descend, but it’s also possible to hike up the back way.
Once you’ve turned right and committed to the Beehive Trail, it’s a steep, nearly vertical in some parts, climb to the Beehive. Here’s where you need to be aware of steep cliff drop offs, metal rungs, and even ladders. Here’s some pictures of what to expect.
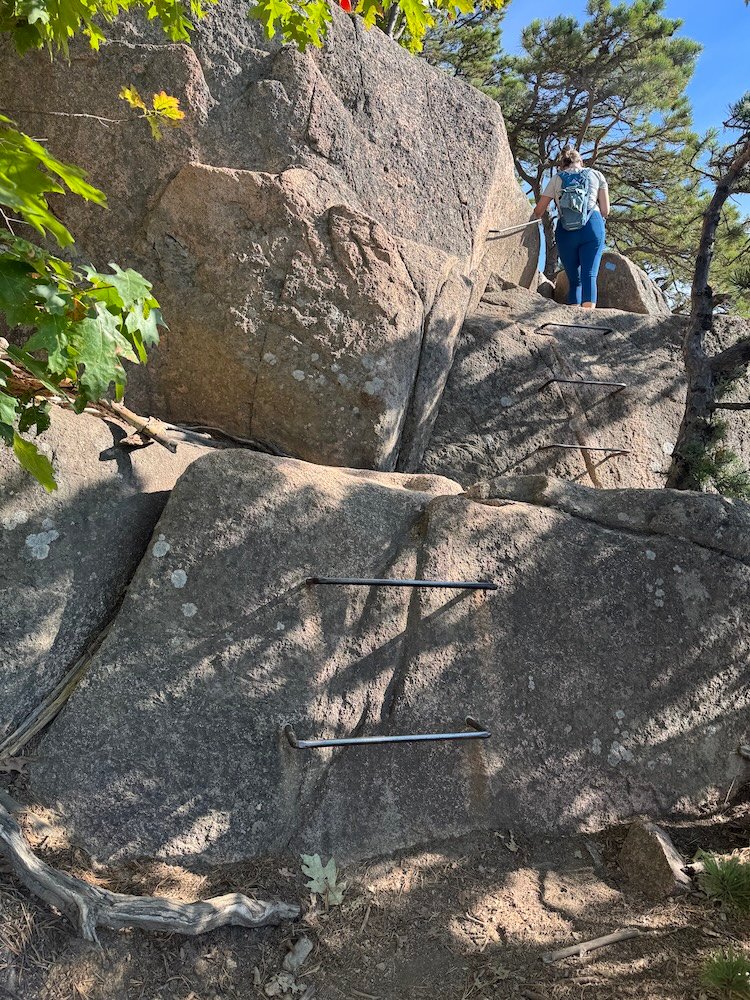
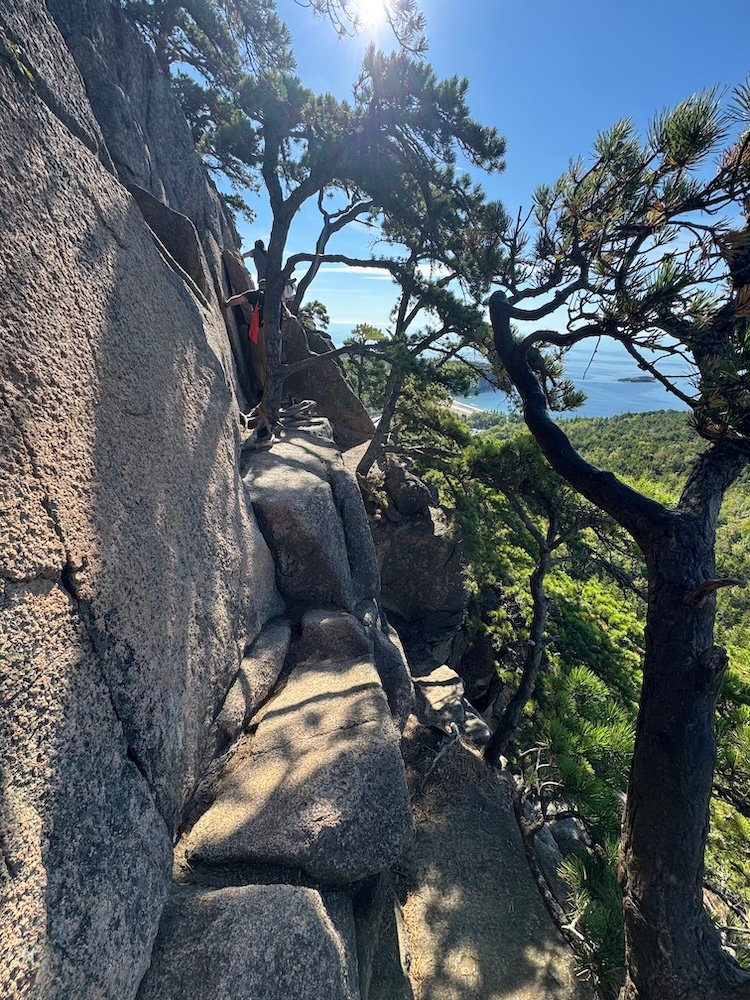
This section of trail doesn’t last for long, but it can take you awhile to go through it. It’s nearly impossible to pass other hikers so you just have to be patient and wait for those in front of you. Luckily, there’s some pretty nice views from the trail so even if you’re stuck waiting, you’ll be able to look out at the ocean.
Once at the top, try to find a spot and enjoy the view. The Beehive Trail is popular so you will be sharing the top of the mountain with plenty of other hikers.
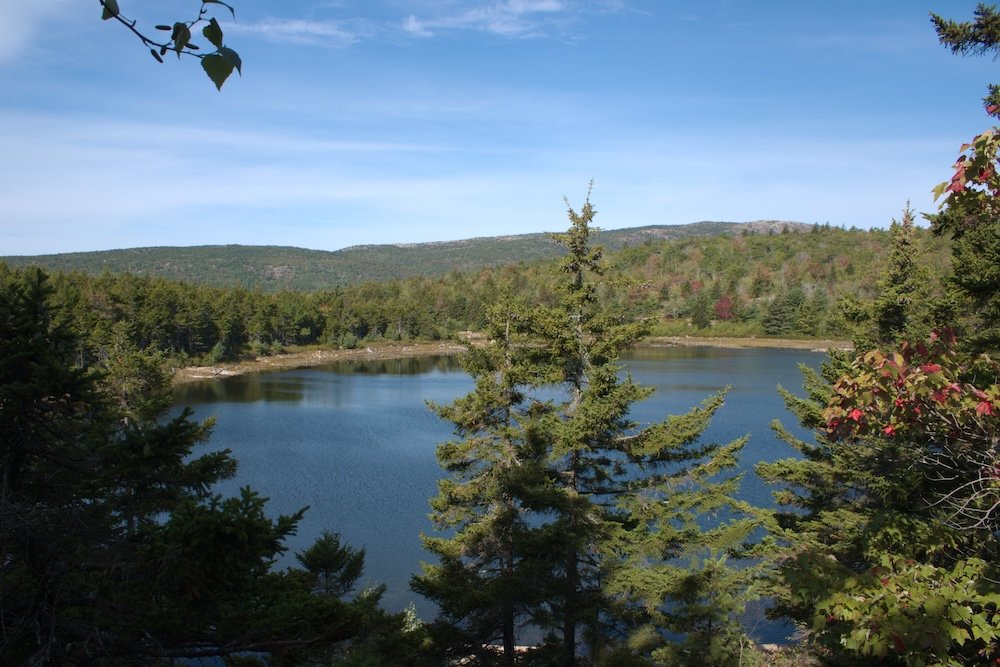
When you’re ready, keep hiking. The Beehive Trail is one way, so you cannot descend the way you came. Instead the trail goes on and leads you to an alternative back route. You can either add a trip to The Bowl, which is a nice lake, or take the shortcut which cuts out The Bowl and 0.5 miles of hiking. I hiked to The Bowl and while The Bowl was nice, it was not my favorite view on the trail. It seemed like a lot of hikers took the shortcut, but it’s completely your choice.
Before you know it, you’ll reach the fork in the trail and then it’s just another quick 0.2 miles and you’re back at the trailhead.
Is the Beehive Trail Worth It?
I think the Beehive Trail was worth it. I’m not scared of heights, so I wasn’t facing those fears. I enjoyed the view and the adventure that came with this trail and I’m really glad I hiked it.
I realize that the trail is not for everyone though, but I would recommend it for those who are up for an adventurous hike.
A Few Tips for Hiking the Beehive Trail
With the overview out of the way, let’s talk about a few tips for the Beehive Trail.
Do Not Hike in Bad Weather
Do not hike the Beehive Trail in bad weather. The trail is dangerous even in good hiking conditions. Strong winds and rain will make this trail even more dangerous. Don’t take your chances.
Wear Sturdy Shoes With Good Grip
For any hike at Acadia National Park, I recommend having good, sturdy shoes and the Beehive Trail is no exception. With uneven trails and rock scrambling, you want to have shoes that you can trust. That means good, sturdy shoes that are broken in.
In addition, make sure your shoes have good grip. On the Beehive Trail, and so many other trails at Acadia, you do not want to be sliding around because your shoes can’t get a grip. I had that happen to me at Badlands National Park and I can’t imagine how bad it would be here at Acadia.
Managing Crowds
The Beehive Trail is popular and that means crowds. Pack your patience because you will not only be sharing the trail with other hikers but also you’ll be waiting for other hikers to finish before you can tackle certain sections of trail. The Beehive Trail is a one way system with little opportunities for passing, so you need to wait for your fellow hikers. Plan more time for hiking than you think you’ll need.
There is a large parking lot across the street from the trailhead. Many visitors stop here not just for the Beehive Trail, but also for Sand Cove. This lot can fill up which leaves street parking. You’ll find cars lining the road leading up to the Beehive Trail.
I started my hike at 8:15 am on a Saturday in September. The parking lot was nearly full when I arrived but I still managed to get a spot without much issue. When I returned an hour and a half later, the lot was packed and cars lined the road. At that point, it was better to take the shuttle or walk Ocean Path from a different lot to try to reach the trailhead. I can’t even imagine how busy the actual trail was.
In contrast, I happened to be in the area at 8:15 am the next morning and it was the opposite. The parking lot was not even halfway full.
I recommend starting early, particularly if you’re hiking on a busy day like a Saturday. No matter when you hike though, you need to be prepared for a busy trail.
Should You Use Hiking Poles on the Beehive Trail?
In many hikes at Acadia National Park, I think that hiking poles can help you out. The terrain is uneven and there’s often large rocks that you’ll need to maneuver around. The Beehive Trail is no exception.
That said, I don’t think hiking poles would help a lot on the way up the Beehive Trail. There’s a few sections (before you hit the one way only section of trail) where the poles might give you a bit of stability and as you make your way back down the poles would help. But for the main part of the trail (with the metal rungs, rock scrambling, and cliff edges), the hiking poles would likely be a hindrance.
As you climb the metal rungs and rock scramble up the trail, you’ll need both hands which is very difficult if you’re carrying a set of hiking poles. While I saw plenty of people with hiking poles, almost everyone had them stored in their backpacks as they traversed the hardest part of the trail.
Fundamentally, it’s your choice, but I would say that if you’re bringing hiking poles, you should also bring a backpack where you can store them away for sections of trail.
How Scary are the Ledges on the Beehive Trail?
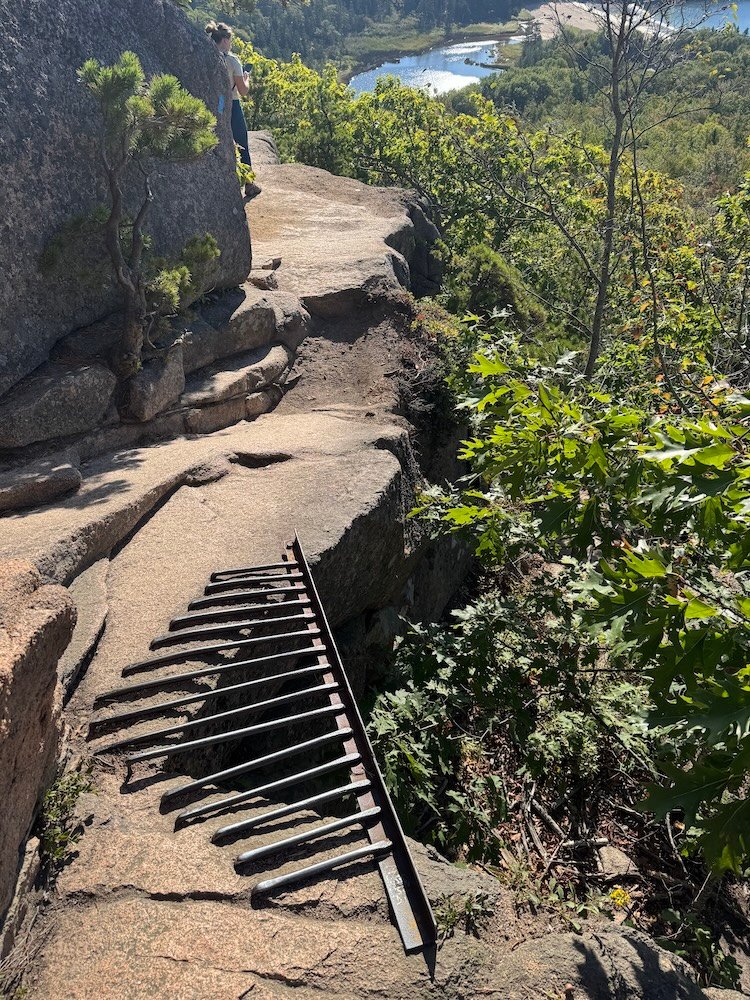
I don’t have a fear of heights and in general, I had no issues with the ledges and sides of cliffs on the Beehive Trail. There was one exception where I was a little nervous. Rock had fallen away and the trail had been replaced by a metal grate. There was still a sheer cliff edge and I’ll admit I was nervous. The sun was out and there were plenty of people ahead of me, but I got nervous that it might be slippery. But the Beehive Trail is a one way system and I had to keep going.
I made it across and had no issues, but that was the one cliff edge that freaked me out. Otherwise, there felt like there was enough space between the mountain walls and the edge of the cliff. Just hug the mountain walls and you’ll be ok.
How Hard is the Rock Scrambling on the Beehive Trail?
I didn’t find the rock scrambling on the Beehive Trail too difficult. If I’m honest, the hardest part about the rock scrambling and the metal rungs is the distance between them. I’m not particularly tall and I have short legs. There were a few places where I had to put in more effort than other hikers simply because I didn’t have the height.
For reference, with shoes, I’m about 5 feet 5 inches tall. I was able to reach everything but barely. I found myself having to rely a bit more on arm strength than I was expecting just because I had to be able to pull myself up rather than use all of the force in my legs. I don’t think it’s a huge issue, but if you’re short, the trail is likely going to be harder for you than it is for someone who is tall. This is especially true if you’re hiking solo.
Should You Hike the Beehive Trail?
Whether or not you should hike the Beehive Trail is not a one size fits all answer. I enjoyed the trail, but I was prepared and knew what I was getting into. I’m not scared of heights, but I’ll admit there was one section of trail that freaked me out a little bit because it was so close to the cliff edge.
If you have a fear of heights, don’t hike the Beehive Trail. I’ve said it before in this article and I’ll say it again: this is not a trail to face your fears.
Now, if you still want those views but don’t want to climb up the metal rungs, consider hiking the Bowl Trail. This trail climbs up the back of the mountain and still gets you to the top of the Beehive. You’ll have a bit of rock scrambling, but no metal rungs and now sheer cliff drops. This trail is two way traffic so you’ll likely pass people who already completed the Beehive Trail and are making their way back down, but there’s no shame in knowing your limits and taking the less adventurous way up. It’s better to be safe and know your limits.
How Long Do You Need at Acadia National Park?
At a minimum, you’ll need one full day at Acadia National Park. This gives you enough time to see the main sights along Park Loop Road and get in a few short hikes.
With two days at Acadia National Park, you can go a bit further. On your first day, spend your time exploring Park Loop Road. Then on your second day, branch out into some of the lesser visited areas of the park. I recommend the Beech Cliffs, Flying Mountain, and Bass Harbor areas.
If you have more than two days, you’ll still have things to do including visiting the small islands nearby. That said, if it were up to me, I’d spend my additional time exploring elsewhere in Maine. Acadia is beautiful, but so is much of Maine.
Entrance Fees for Acadia National Park
Entrance to Acadia National Park costs $35 per vehicle and your pass will be valid for seven consecutive days. Annual passes, such as the America the Beautiful pass are also accepted.
Note that visiting Cadillac Mountain Road comes with an additional fee. To visit Cadillac Mountain Road, you’ll need to pick up a reservation which comes with a timed entry. You can stay as long as you want, but you must have a valid entrance ticket in order to be permitted to drive up the mountain. Reservations cost $6 per vehicle.
Getting Around Acadia National Park
Acadia National Park surprised me with its transit system. While many national parks through the United States force visitors to have their own form of transportation, Acadia is different. You can bring your own vehicle, but if you don’t have a vehicle, you can still get to most places in the park.
A handy shuttle service connects Bar Harbor and Acadia National Park. Then within park, additional shuttles help to move visitors around. In total, there’s 11 lines that take visitors to all of the main sights throughout Bar Harbor and Acadia National Park. And the best part? This shuttle is completely free thanks to a massive donation that LL Bean makes to Acadia National Park each year.
Where to Stay at Acadia National Park
Bar Harbor is the closest town and sits right outside Acadia National Park. This is where most visitors stay as it’s the most convenient. You’ll have about a 15 to 20 minute drive to the popular Park Loop Road. That said, prices for hotels in Bar Harbor are understandably high. Make sure to budget accordingly.
I travel on a budget so my accommodation situation looked a little different. I spent the night in Bangor, which is about an hour and a half away from Acadia National Park. I left Bangor early in the morning and spent the day exploring Acadia National Park. Then I spent one night in Bar Harbor since I had tickets for sunrise at Cadillac Mountain the next morning. After a second day of exploring Acadia National Park, I drove back to Bangor where hotels were cheaper.
When to Visit Acadia National Park
Acadia is best visited from May through October as this is when the top sights are open. During the winter months, you can still visit Acadia National Park, but some roads close and the hiking can become dangerous.
In summer, you’ll have the warmest weather, but you can also expect a decent amount of tourists. Normally as it gets later in the season, crowds thin out, but this is New England which is famous for its fall foliage. In late September and October, you can expect big crowds who come not just to see Acadia National Park, but also to see all the bright fall colors.
I visited in mid September and had really great weather. The trees had barely started to turn colors so if it’s important to you that you see the fall colors, I’d recommend early October. That said, there’s no guarantee when you’ll get peak colors as it changes slightly every year based on weather.
Final Thoughts
The Beehive Trail can be a fun adventure, but only if you’re prepared and know what you’re getting into. If you’ve read all of this information and still feel like you’re ready and prepared, enjoy your hike!
Continue Your Adventure
Acadia National Park: For some easier hiking, start with my list of easy hikes at Acadia. At Jordan Pond, hiking can be easy or difficult depending on which route you choose. For non-hiking, visit the highlights of Park Loop Road. Loop the highlights of Acadia together in this one day itinerary or if you have more time, try my two day itinerary.
Maine: In Portland, cruise the islands on a Mail Boat Tour. Nearby Portland is Cape Elizabeth which is home to the most photographed lighthouse in the United States. Learn more in my Maine Travel Guide where you’ll also find my five day Maine itinerary.
More in New England: Maine is just the beginning of adventures in New England. In Rhode Island, tour the over the top mansions in Newport. In Connecticut, visit the historic fishing village of Mystic or one of its many state parks. Take a quick detour through New York to visit Albany. And don’t miss out on Stowe, Vermont – it’s a favorite among many travelers. Loop together these highlights in a great itinerary in either 10 days or one week.
US National Parks: Start planning your national park vacation with my US National Park Travel Guide. You’ll find information about each park, photos, itineraries, budget tips, advice for non-hikers, the best scenic drives, and more. Plus, don’t forget to book your timed entry reservations in advance!